L O A D I N G

Blogs | Expert Insights on Property Refurbishment & Renovation

A single-story extension can enhance a home by expanding living space and providing more space, introducing more natural light, thereby transforming the existing structure’s functionality and ambiance. Homeowners can maximize indoor-outdoor flow and boost property value by integrating options such as wraparound, rear, or side extensions. Open-plan layouts improve the flow and connection throughout a living space. To truly understand their benefits, it’s essential to explore the detailed planning and execution strategies that ensure their success.

Key Takeaways

Adds Extra Space: Create additional rooms such as larger kitchens, home offices, or guest areas to better accommodate your lifestyle.

Enhances Natural Light: Incorporate elements like skylights and full-height glazing to brighten interiors and create a more open, airy feel.

Boosts Property Value: Improve both functionality and visual appeal, contributing to a higher market value for your home.

Flexible Design Options: Choose from wraparound, rear, or side extensions to suit your property’s unique layout and needs.

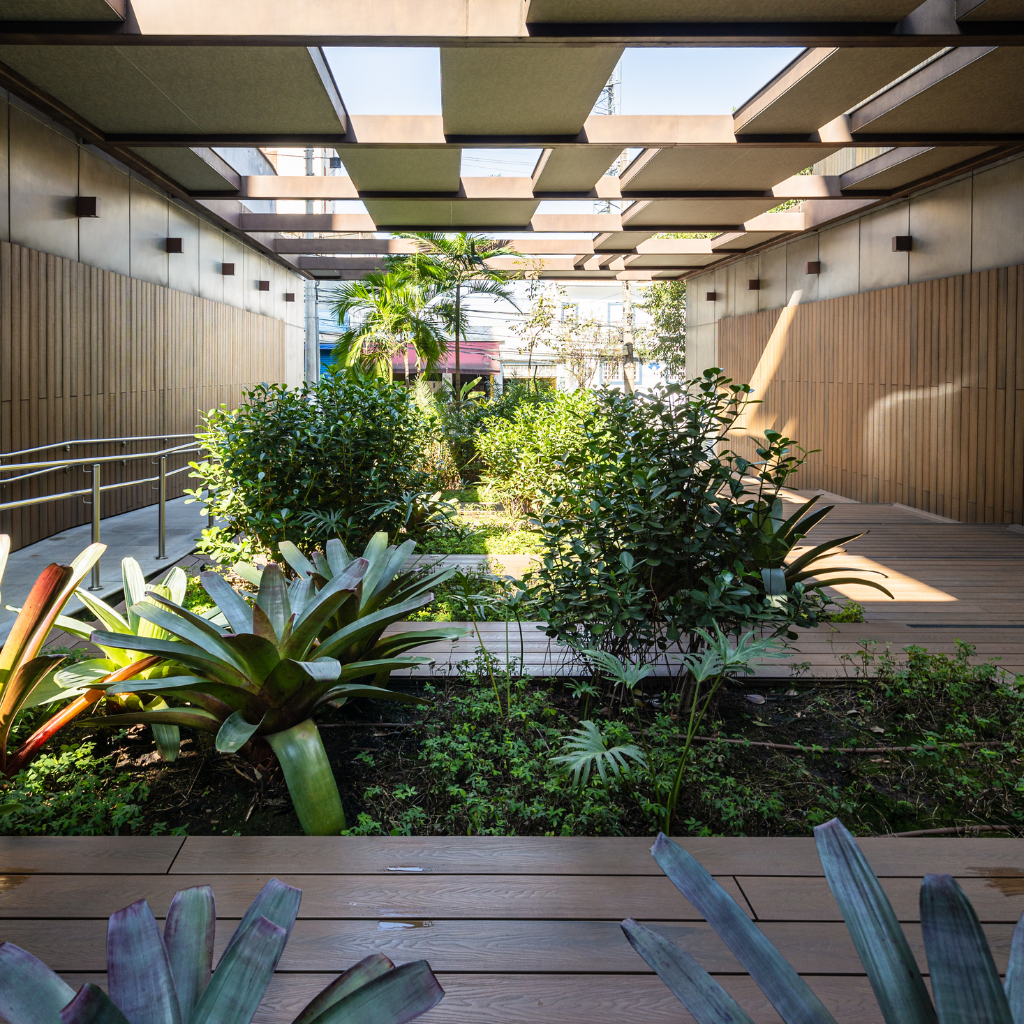
Improves Indoor-Outdoor Flow: Designs that include direct garden access help blur the line between inside and outside living spaces.

What Are the Best Extension Ideas for a Single Storey?

Exploring popular single-story extension ideas highlights a growing focus on making the most of limited space while boosting visual appeal. Whether you’re gathering inspiration or preparing to start construction, understanding the cost of a single-story extension is essential for effective planning and budget management.

Wraparound extensions provide a comprehensive way to expand your living space by extending along multiple sides of the property. When carefully planned, a single-story wraparound extension can improve both the functionality and flow of your home, seamlessly integrating with the existing layout and structure. If your property is within a conservation area, be prepared for extra planning regulations and approval procedures that may affect your project’s timeline and design options. Engaging with your local planning authority early and involving neighbors through a consultation scheme can help address concerns, reduce the risk of objections, and keep your project on track.

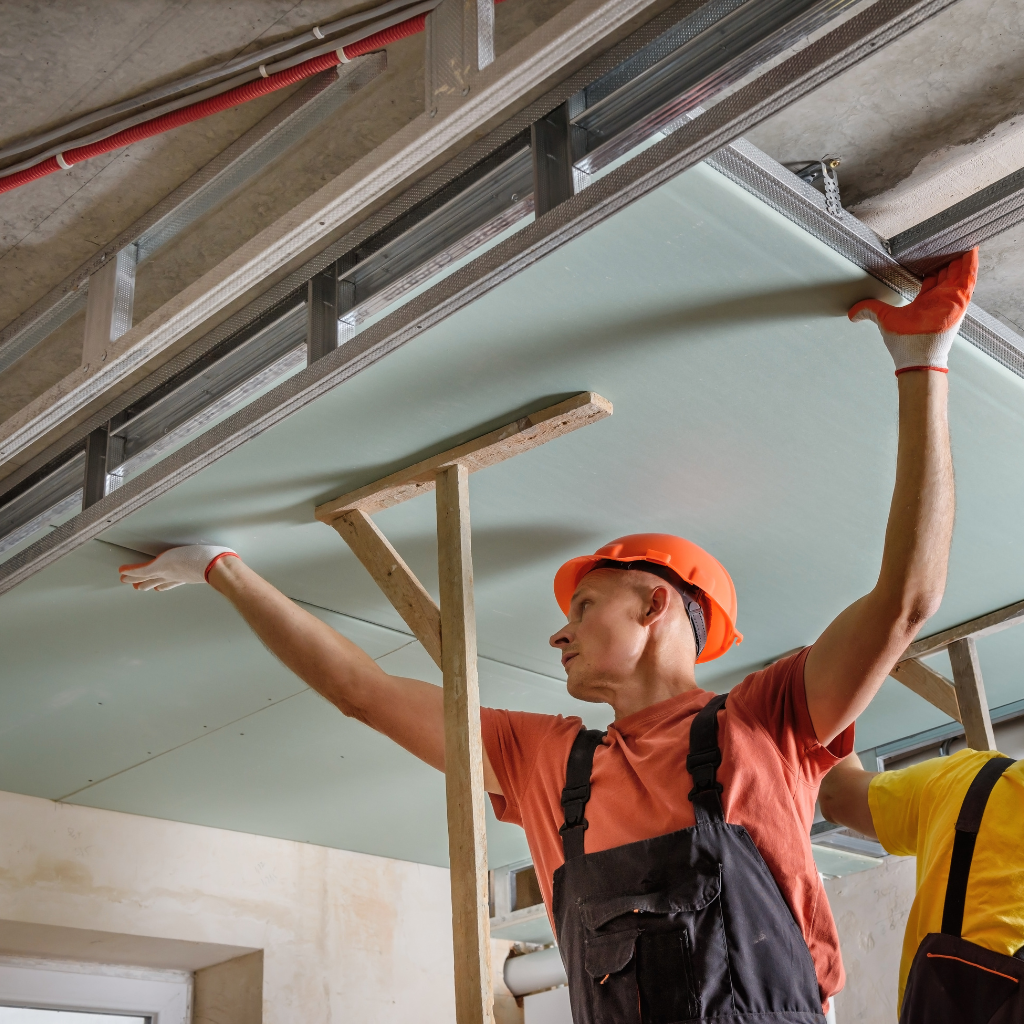
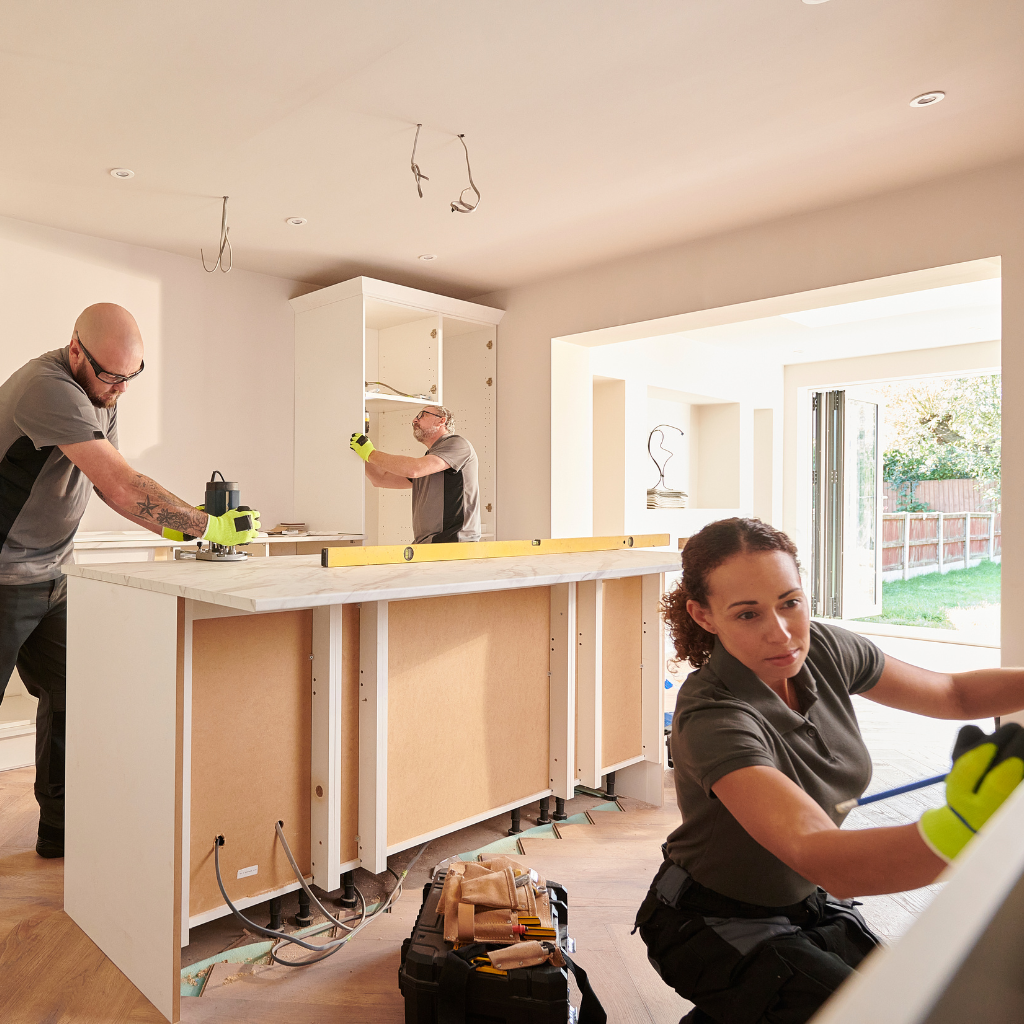
Effective project management is essential to ensuring the smooth execution of an extension project. From selecting the right construction company and coordinating the team to overseeing installation, plumbing, and interior work, each stage demands careful management to ensure both efficiency and quality.

For homeowners looking for an affordable way to increase natural light and strengthen the connection to their garden, adding a conservatory to the extension is a popular option. Working with professionals can offer valuable guidance on design, ideal dimensions, and how to get the most out of your investment.

With thoughtful planning and a structured approach, even the most complex projects can run smoothly, creating a beautiful and practical space that enriches both your home and lifestyle.

Exploring Popular Single-Storey Extension Ideas

Rear extensions are one of the most popular single-storey extension options due to their seamless integration with existing structures. They improve the flow between the ground floor and the garden, and can also provide room for a new main bedroom. When considering a project of this scale, it’s important to factor in the single storey extension cost, which can vary depending on design complexity, materials, and required structural work.

Side extensions, though often underutilized, provide a smart way to make use of narrow outdoor areas, offering valuable additional living space. For homeowners looking to maximise space without dramatically altering the property’s footprint, side extensions offer a cost-effective solution—though, again, understanding the full single storey extension cost is key to proper planning and budgeting.

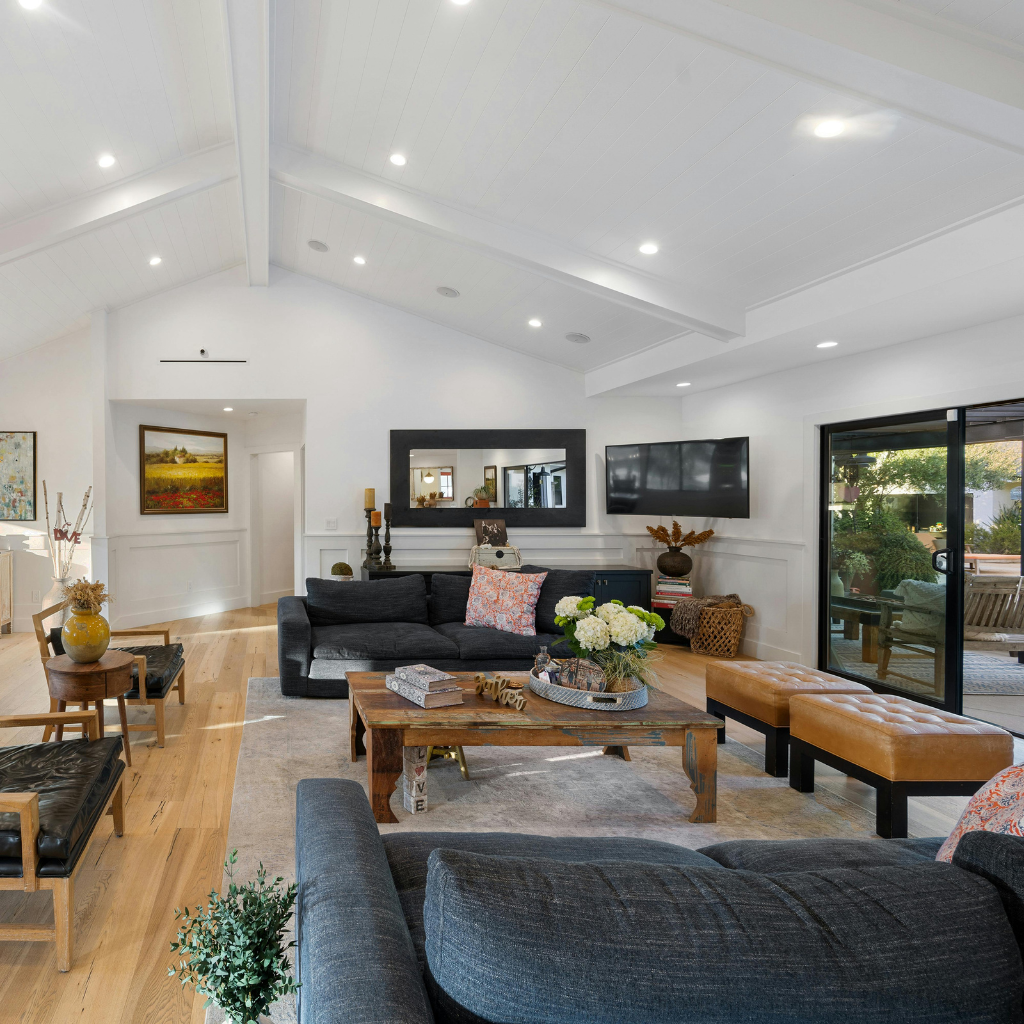
Integrating an open-plan design in these extensions can create versatile, multifunctional areas perfect for family living and entertaining. Opting for an open-plan layout within these extensions can transform the new space into a vibrant hub for family activities.

When it comes to roofing, flat roofs provide a sleek, contemporary look, while pitched roofs complement traditional architecture by combining visual harmony with increased structural strength.

Maximizing Space with Wraparound Extensions

When planning to expand a single-storey home, wraparound extensions are a highly effective way to maximize space and transform your living areas. This approach provides extra living space while preserving a natural flow between the original structure and the new addition.

Wraparound extensions typically combine both rear and side extensions, encircling the home. This design not only makes the most of the available space but also improves the property’s overall view and aesthetic appeal. Whether you’re aiming for a modest upgrade or a large single storey extension, the flexibility of this layout allows homeowners to fully utilize their extra floor space. It’s a cost-effective alternative to moving, offering a smart solution to gain more room without the hassle of relocation.

Some homeowners even opt for a return extension, which connects the rear and side extensions in an L-shaped configuration, further enhancing the openness and usability of the ground floor.

Before starting your project, it’s crucial to understand the costs involved and ensure you meet all legal requirements. Obtaining planning permission from the local authority is often necessary, as wraparound extensions may not qualify as permitted development. Compliance with building regs and oversight from building control is essential to guarantee safety, stability, and energy efficiency—particularly regarding proper insulation, solid foundations, and the use of appropriate materials such as wood, tiles, and paint.

When planning, many decide to extend kitchens and living rooms or create multi-functional areas. The result is often a seamless integration that feels like part of the rest of the home. A professional guide is highly recommended to help navigate the design, material selection, and construction phases.

Naturally, the scope of work and costs will vary based on the complexity and design of the project. Homeowners can expect a strong return on investment, enhancing both their lifestyle and the value of their property. Choosing quality materials and hiring experienced contractors ensures the installation is carried out correctly.

Ultimately, if you’re looking to create more functional space while saving money over time, a wraparound single-story extension is a prime example of how thoughtful planning can significantly enhance your home.

What Are the Benefits of a Single Floor Extension?

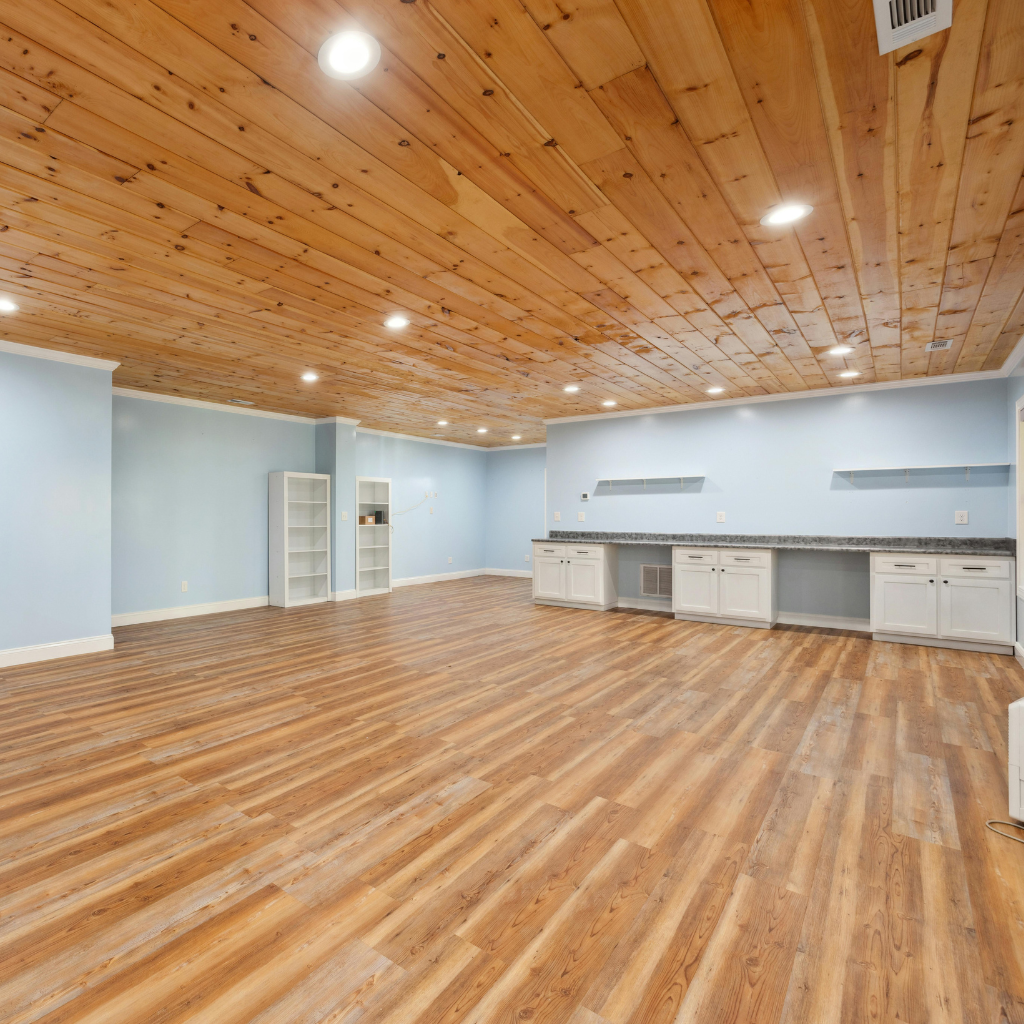
A single storey extension greatly increases living space, accommodating evolving lifestyle needs without the complexities of adding multiple floors. It’s a fantastic way to maximize the use of space while keeping the design simple and easy to execute. Single-story extensions are typically more cost-effective than other types of building projects, offering an affordable way to expand your home. They also enhance natural light intake, boosting both the appearance and practicality of interior spaces. The size and design of the extension allow for more efficient use of space, ensuring a seamless connection between new and existing areas. Careful attention to the layout is crucial to maximize every available inch.

Additionally, these extensions create a seamless connection between different parts of the home, promoting smooth movement that improves both functionality and flow. To make sure everything is managed correctly, it’s wise to hire specialists who can support you throughout the entire process—from design through to the finishing touches.

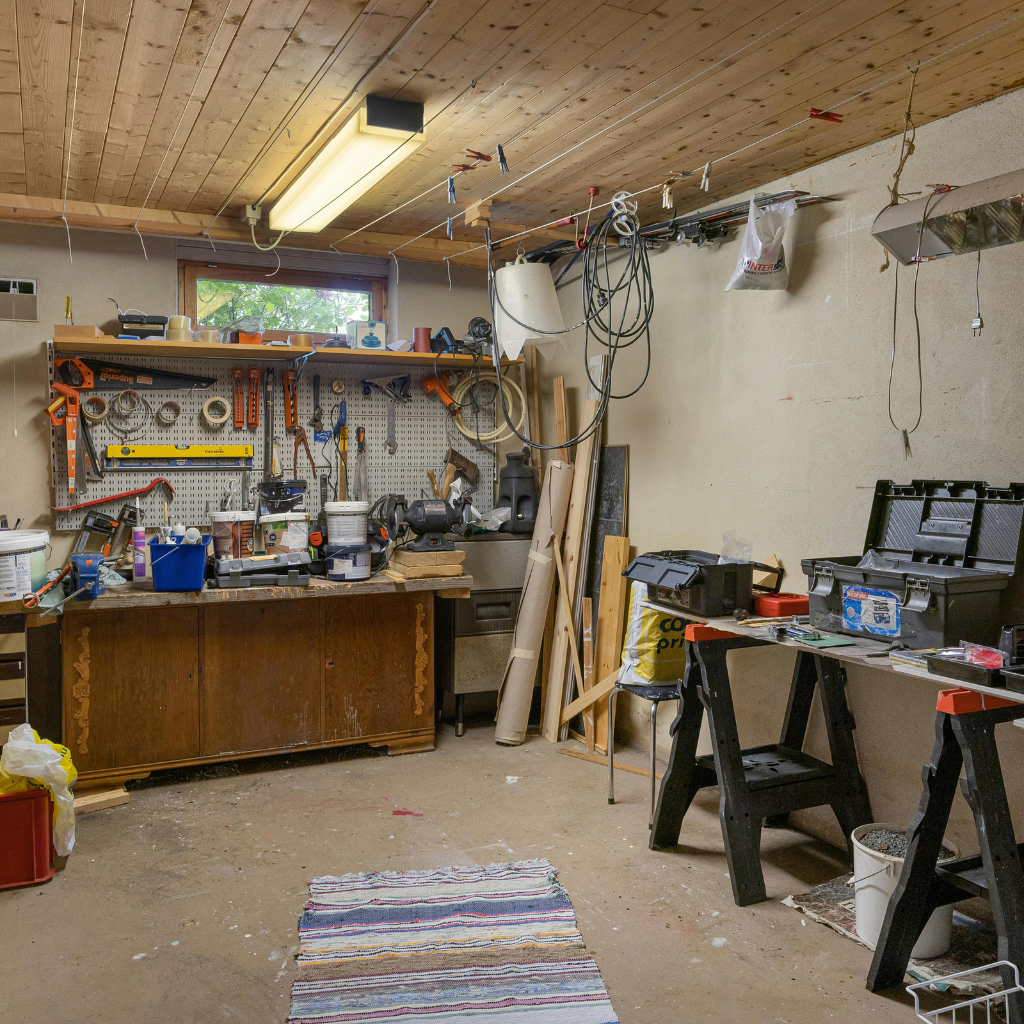
If you’re thinking about a conversion or adding new features like a boiler or built-in storage, it’s important to carefully assess your space and select materials and elements that complement your home’s style. Seeking advice from professionals can also help you stay on budget while turning your vision into reality.

While the project may initially feel overwhelming, starting with a clear plan is always wise. Agree on a clear schedule with your team to prevent unnecessary delays. Once you’re satisfied with the initial designs, you can move forward with confidence, knowing your project is well managed.

Many homeowners take advantage of free consultations with suppliers to select materials that best match their vision. Whether you’re just beginning or ready to start, these steps will guide you toward creating a space that meets your needs and enhances your home. The journey from concept to completion is a rewarding process that, with the right planning, results in a space you and your family will enjoy for years to come.

Increasing Living Space with Extensions

Expanding a home through the addition of a single-story extension offers a myriad of benefits, primarily the seamless augmentation of living space. Whether adding a single-story rear extension, a side extension, or even a small extension, these additions integrate smoothly with existing structures, maximizing utility and aesthetics. It’s a simple yet highly effective means of transforming your home.

Here are the key advantages:

Optimized Floor Space: A single storey extension notably increases the usable floor space within a home, providing room for additional functionalities like a larger kitchen, an extra bedroom, or a home office. This extension can bring much value to your property by giving you the space to accommodate your family’s growing needs.

Versatility: Whether opting for a large single-story extension or a more modest bump-out, the new extension can be customized to suit various personal and architectural needs. There are many options, and working with a surveyor can help you create the perfect plan to match your home’s style.

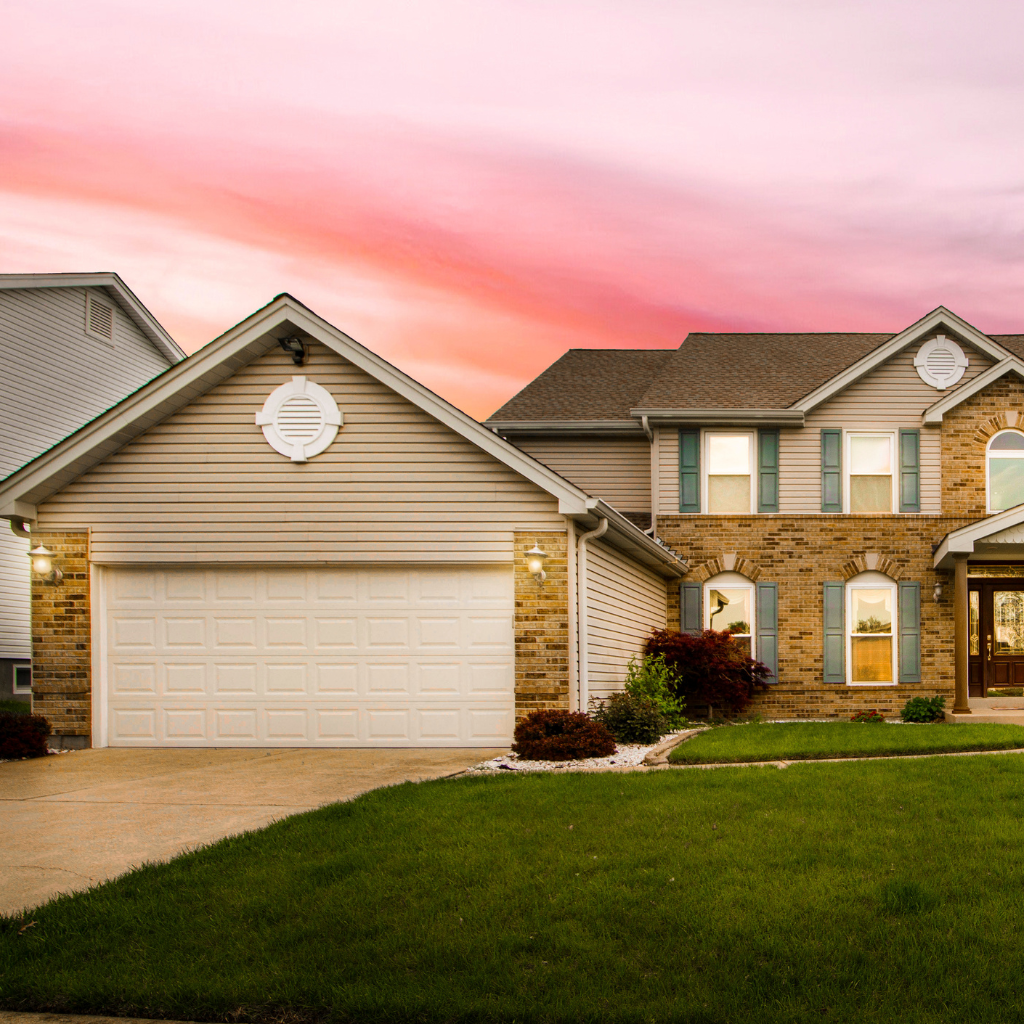
Enhanced Property Value: Expanding the living space often translates into an increase in property value, making home extensions a worthwhile investment for homeowners. When you decide to sell, this extension can make your home more appealing to potential buyers, especially if the extension is recently completed with high-quality fittings and electrics. It’s a great way to apply your vision for a more functional, modern living space that will sell quickly.

When planning your extension, it’s essential to consider the costs of labor, materials, and any required plumbing or electrical work. Depending on the project’s size, you may need to submit your designs to the local council for approval and, in some cases, apply for the necessary planning permissions.

To stay organized, it’s helpful to list out your plans and make sure all components—from parts and fittings to installations—are accounted for. Hiring professionals such as a licensed plumber, electrician, and experienced contractor will ensure the work is completed efficiently and meets all safety standards.

Ultimately, if you’re ready to take on a home expansion, the investment in a single-storey extension is a project that adds tremendous value, functionality, and beauty to your home. Plus, it’s much less complicated than a full-scale renovation, and it can often be done with less disruption to your daily life.

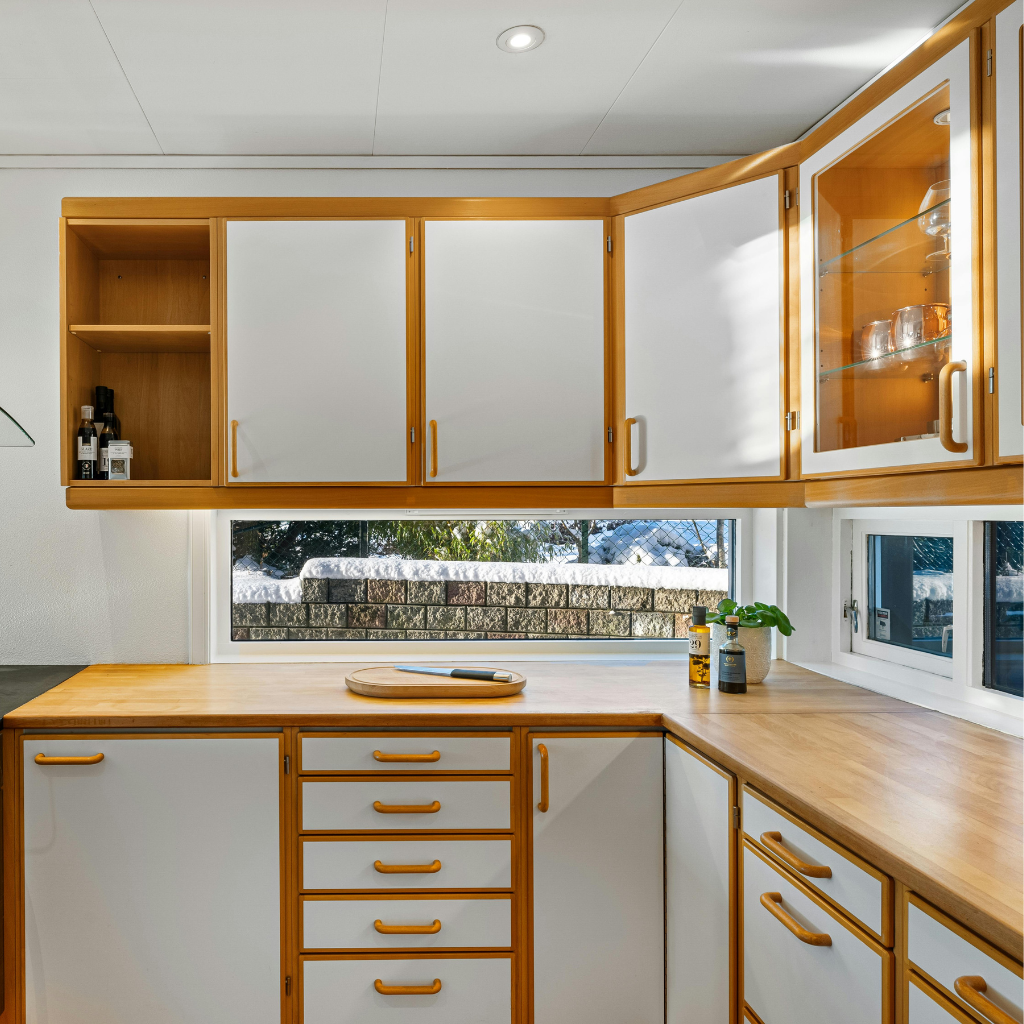
Enhancing Natural Light in Your Home

Integrating a single-story extension into a home maximizes space and considerably enhances the influx of natural light, particularly when designed with large windows or skylights. A well-planned extension can transform how light permeates the interior, effectively merging inside and outside spaces. Whether opting for a flat roof extension with integrated skylights or a pitched roof with expansive glass panels, the result is a brighter, more inviting living environment. Consider a single-story kitchen extension with full-height glazing facing a patio area to maximize daylight and visually expand the dining area.

FeatureBenefitIdeal for
Large WindowsAmplifies natural lightDining areas, Living rooms
SkylightsEnhances vertical natural illuminationKitchens, Bathrooms
Transparent BoundariesBlurs lines between indoor and outdoorPatio areas, Garden extensions

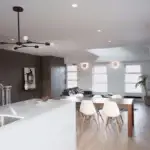
Creating a Seamless Ground Floor Layout

Building upon the enhanced natural lighting achieved through strategic design choices in single-storey extensions, the architectural integration of such expansions can further optimize the ground floor layout of a home.

This planning offers a multitude of benefits:

  1. Enhanced Functionality: By carefully considering the kitchen extension cost and extension cost in the UK, homeowners can create a utility room or a seamlessly flowing kitchen-diner area that maximizes usability and efficiency.
  2. Aesthetic Cohesion: Utilizing high-quality building materials guarantees that the new space not only meets but enhances the existing structure’s aesthetic, fostering a perfect space for both living and entertaining.
  3. Regulatory Compliance: Attention to details like the party wall agreement facilitates smooth planning and execution of a rear single-story extension, confirming all modifications are legally sound and structurally secure.

What Types of Single Storey Extensions Are Available?

Single-story extensions offer various configurations to enhance a home’s living space and aesthetic appeal.

The side extension, often employed to utilize narrow lateral spaces, seamlessly integrates with the existing structure to expand functional areas.

Meanwhile, rear extensions capitalize on backyard space to create expansive, light-filled environments.

Wraparound extensions provide a thorough solution by enveloping multiple sides of a property.

Exploring the Single-Storey Side Extension

Exploring single-storey side extensions reveals a variety of architectural options that can greatly enhance a home’s functionality and aesthetic appeal. Typically undertaken by skilled house extension builders, these projects expand living areas without significantly altering the original footprint.

Key benefits include:

Space Maximization: Side extensions provide valuable additional square footage for living areas or utilities, making them a smart option for properties with limited land.

Design Integration: Architects carefully design these extensions to blend seamlessly with the existing structure, ensuring they complement the home’s original style.

Regulatory Compliance: While building a side extension usually involves submitting a planning application, this process helps ensure the design aligns with local architectural standards, boosting both functionality and property value.

The Versatility of a Single-Storey Rear Extension

While side extensions serve a specific purpose, a single-storey rear extension offers unmatched versatility, easily adapting to a wide range of homeowner needs and design preferences.

This house extension increases living space while blending seamlessly with the existing structure.

By consulting a structural engineer, homeowners can ensure the design meets building control regulations and permitted development rights, making the approval process smoother.

Rear extensions like these can transform a home by adding a spacious kitchen, a larger living area, or an additional bedroom, all while preserving the home’s external harmony.

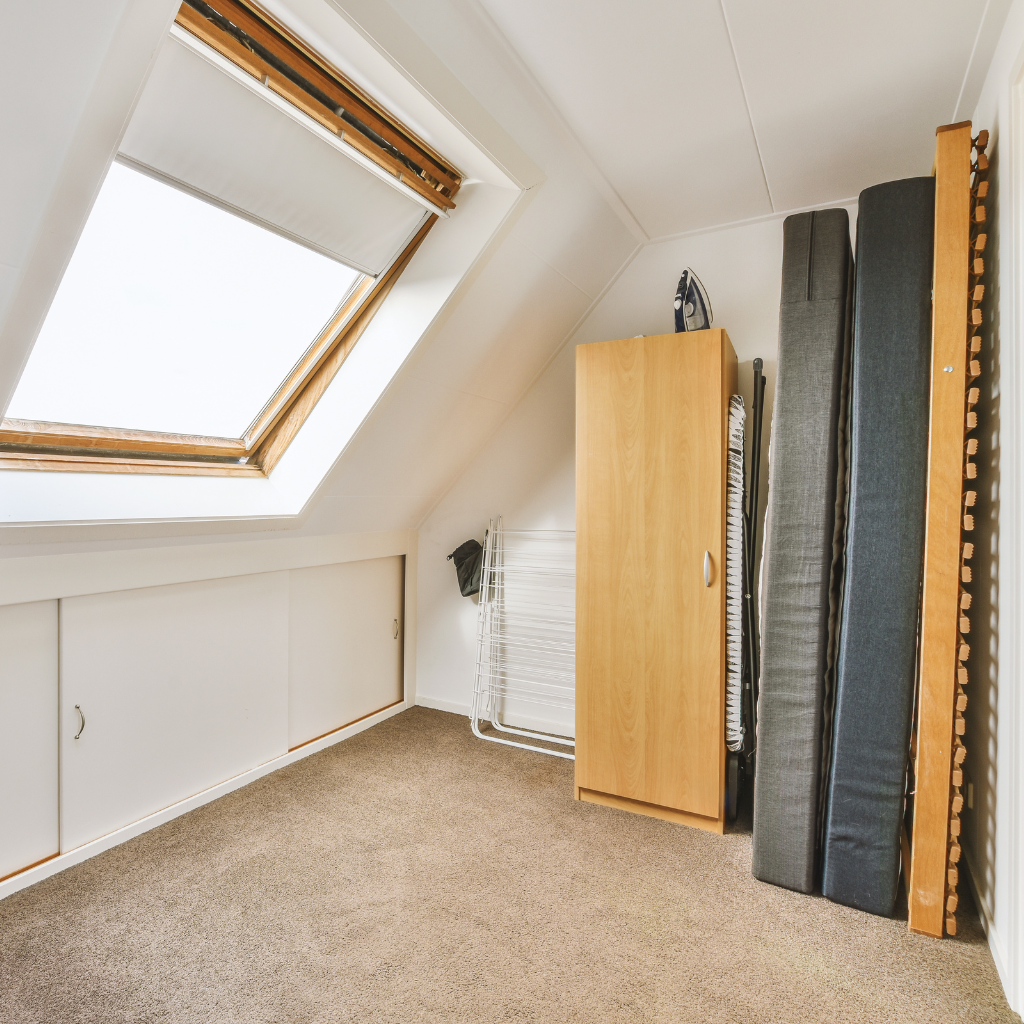
Careful planning and execution of a single-story rear extension can significantly improve both the functionality and visual appeal of a home.These essential tips for your loft space can provide valuable guidance for those also considering vertical expansion.

Innovative Single-Storey Wraparound Extension Options

Building on the idea of rear extensions, homeowners can also explore the creative and practical advantages of wraparound extensions.

These innovative single-story wraparound designs cleverly combine rear and side extensions to significantly expand living space.

Here are some of the available options:

  1. Full Wraparound: Encircles the rear and side of a property, maximizing floor space and dramatically altering the home’s layout.
  2. L-Shaped Design: Ideal for corner plots, it seamlessly integrates the rear and one side extension, substantially increasing space.
  3. Glass-centric Extension: Features expansive glass panels or sliding doors to maximize natural light and seamlessly connect indoor and outdoor spaces, ideal for a contemporary look.

How to Plan a Successful Single-Storey Extension Project?

Careful planning is essential to the success of a single-story extension. A crucial aspect of this involves understanding the planning permission process, which can differ based on the size and location of your project. To ensure all necessary approvals are secured before starting construction, it’s crucial to proceed with the required applications promptly. Choosing the right type of extension involves considering factors such as construction costs, structural requirements, and how well it complements the existing property’s aesthetics. Taking the time to carefully evaluate your options will help you make a well-informed decision that aligns with both your needs and budget. Whether you opt for a faster, simpler project or a more intricate design, thorough planning sets the foundation for success.

Managing the project budget effectively demands accurate cost estimates and strategic resource allocation. By overseeing each phase diligently, you can avoid unnecessary expenses, negotiate cost-sharing with contractors, and maintain financial control throughout the construction process.

If you’re moved by the idea of a more functional and aesthetically pleasing home, obtaining a quote early on can help you understand terms and conditions and allow you to turn your dream into a reality without surprises. Being proactive and informed will help you stay ahead of the game and avoid delays in the project.rmed will help you stay ahead of the game and avoid delays in the project.

Creating a Comprehensive Extension Plan

Planning a successful single-story extension starts with creating a detailed plan that carefully considers both the aesthetic and practical needs of the project.

Key steps to consider include:

Initial Consultation: Meet with professionals such as architects, project managers, and potentially local planning authorities to assess the feasibility of your ideas and ensure compliance with local regulations.

Design Development: Focus on designing a single-story extension that harmonizes with the existing structure yet fulfills modern needs. Detailed architectural plans should outline every aspect, from spatial distribution to material specifications.

Cost Estimation: Prepare a detailed budget considering all expenses, including construction, materials, and fees, to avoid financial overruns and guarantee a smooth building process.

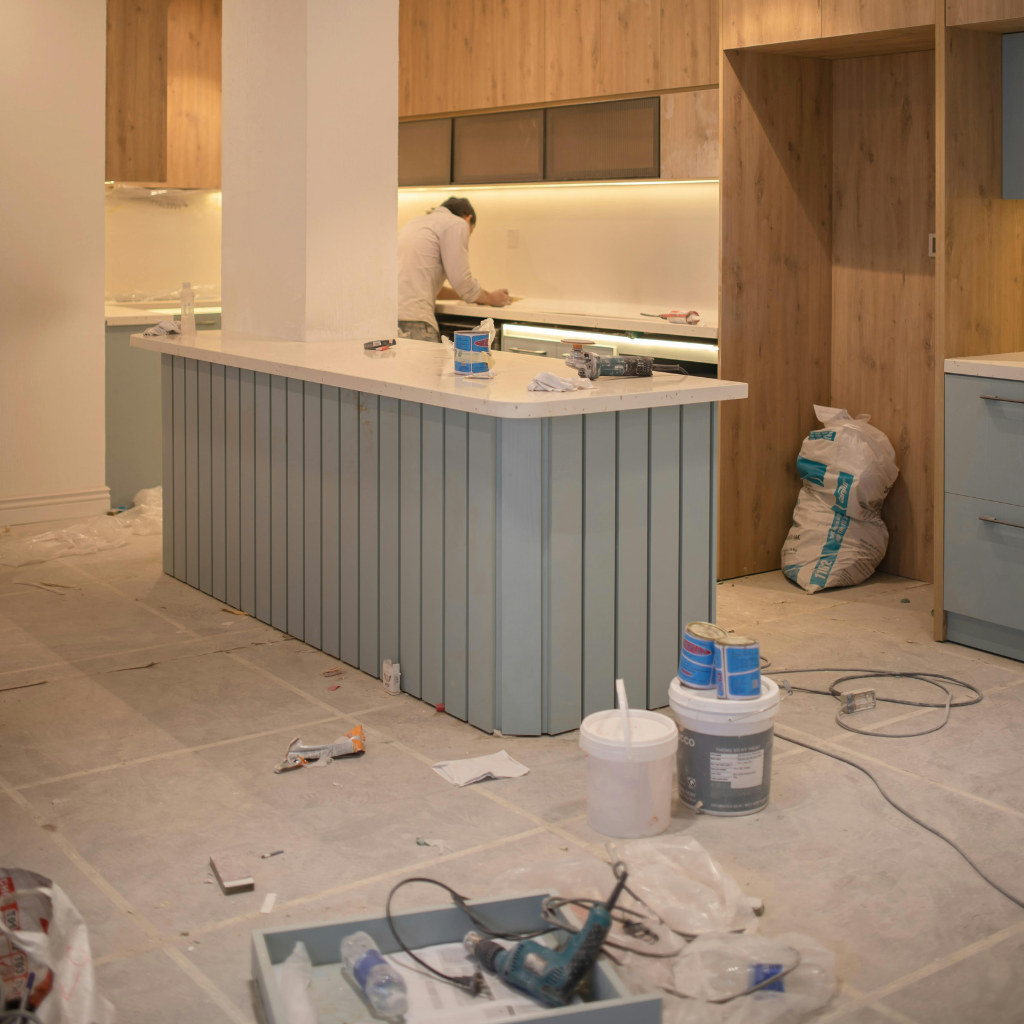
Managing the Build Cost Effectively

Ensuring cost-effectiveness when managing the construction of a single-story extension demands careful planning and smart decision-making.

Here are three key steps to help you manage the build efficiently and within budget:

Detailed Budgeting: Outline all possible expenses, including the average cost per square meter and any additional fees that may occur.

Material Selection: Choose materials that balance durability with visual appeal.

Contractor Selection: Employ skilled contractors who provide clear pricing and deliver efficient service.

Their expertise helps ensure the single-story extension is finished on time and within budget, reducing the risk of unexpected costs.

How Much Does It Cost to Build a Single-Storey Extension?

The cost of building a single-story extension is generally influenced by factors such as materials, labor, and design complexity.

On average, the price per square meter can vary widely depending on architectural styles and finish selections.

Grasping these cost drivers is crucial for homeowners to accurately budget their extension projects.

Factors Affecting the Extension Cost

Determining the cost of building a single-story extension involves several factors, each contributing variably to the overall expense.

Here are the primary factors:

  1. Size and Complexity: The bigger the extension, the higher the cost. Complexity in design also affects the price, as more intricate features require additional resources and skilled labor.
  2. Material Selection: The type of materials used can significantly impact the overall cost of a single-story extension, with premium, long-lasting options typically costing more.
  3. Location: Geographical location can impact the cost of an extension. Urban areas generally entail higher labor and material costs compared to rural settings.

Understanding these factors guarantees a more accurate estimation of a single-story extension’s cost in the region.

Average Cost Per Square Metre for Extensions

Understanding the factors that affect extension costs is key to accurately estimating the average expense per square meter. For homeowners looking to add single-story extensions, the typical cost per square meter usually falls between £1,500 and £2,500. The variation in costs often depends on whether you’re opting for a modest rear extension on a semi-detached house or a more ambitious design aimed at transforming the entire home. Local authority regulations also significantly influence expenses, especially through planning permissions and compliance requirements. Choosing designs that minimize disruption to everyday living not only improves the home’s appearance but also helps ensure a more efficient and cost-effective construction process.

Do You Need Planning Permission for a Single Storey Extension?

For homeowners considering an expansion, it’s essential to find out if a single-story extension requires planning permission. The approval process involves complying with architectural guidelines and local regulations, which can vary greatly by region. In certain situations, exemptions may apply, permitting extensions without formal planning permission based on factors like size, location, and the effect on the surrounding environment.

Navigating Planning Application Requirements

While pondering a single-story extension, one must first ascertain whether planning permission is required, a process governed by specific regulatory frameworks.

Here are key aspects to reflect on:

  1. Development Rights: Check if the intended single-story extension falls within the permitted development rights associated with the original house.
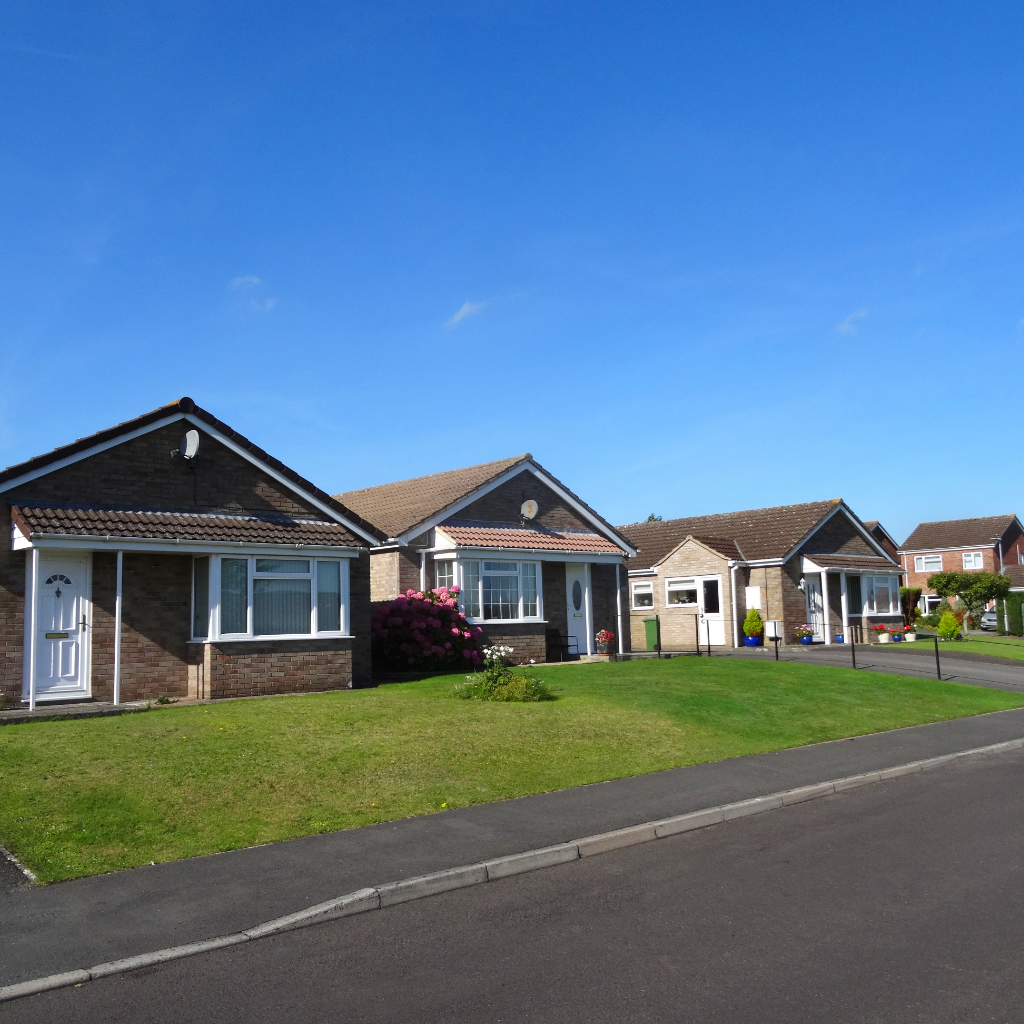
  2. Planning Application Requirements: Detailed plans must illustrate how the extension does not extensively alter the aesthetic of a detached or semi-detached home, preserving the visual integrity of the neighborhood.
  3. Proven Track Record: Work with experienced professionals who have a strong track record in securing planning permissions and ensuring the extension harmonizes with the first floor’s design and the household’s daily lifestyle, especially when dealing with small house extensions.

Exemptions from Planning Permission

Although many homeowners assume that any structural addition requires planning permission, certain single-story extensions can be exempt under specific conditions.

This exemption is especially applicable when the extension project focuses on increasing living space without significantly changing the external appearance of a detached house. For instance, a pitched roof extension that aligns with the existing architectural style may not need planning permission, provided it remains within specified size limits. These exemptions streamline the home improvement process, making it simpler to expand your space. Knowing these details can make a big difference, making a single-story extension an attractive choice for homeowners wanting to expand their living area without dealing with complex bureaucracy.

Conclusion

In summary, single-story extensions provide a versatile combination of improved functionality and visual appeal, significantly transforming living spaces. They seamlessly integrate with existing architectural elements and can increase property value. Successful projects rely on careful planning, adherence to local regulations, and detailed cost evaluation. For homeowners aiming to enlarge their living space while maintaining architectural consistency, single-story extensions offer a wise and attractive investment.

To successfully renovate a basement, begin by addressing any moisture issues with waterproofing and inspecting for structural integrity in compliance with local codes. Choose moisture-resistant flooring like vinyl or ceramic tile, and plan an efficient electrical layout with recessed lighting. Opt for ceiling installations that provide accessibility to utilities and complement the space aesthetically. Furnish strategically, using modular furniture to maximize space. For further insights on transforming your basement into a functional area, explore detailed guides and professional advice.

Key Takeaways

  • Assess basement layout, ensuring compliance with local building codes and addressing structural and moisture issues before starting renovations.
  • Choose moisture-resistant flooring such as vinyl or ceramic tile to prevent water damage and enhance durability.
  • Implement waterproofing measures, including sealants and drainage systems, to protect against moisture and potential mold growth.
  • Install a drop ceiling to provide easy access to electrical and plumbing systems while maintaining a comfortable ceiling height.
  • Ensure professional installation of electrical systems and strategically place lighting to maximize functionality and ambiance.

How to Start Your Basement Renovation Project?

Initiating a basement renovation project requires meticulous planning, beginning with an extensive assessment of the space to determine its potential functionalities. This initial step is crucial for moving forward confidently with a significant amount of preparation.

Addressing moisture issues is essential to guarantee the longevity of the renovation, involving inspections for leaks and the implementation of waterproofing measures to minimize risks. Additionally, understanding and adhering to local building codes and obtaining the necessary permits are fundamental steps that must not be overlooked to ensure compliance and safety, especially when adding egress windows or reworking the top plate of framing for an entire room.

Planning Your Basement Remodel

When learning how to renovate a basement, thoughtful planning is crucial. First, assess the existing layout and square footage to maximize functionality without compromising structural elements.

For unfinished spaces, make sure to plan for dust control during the framing and drywall process. Prepping includes gathering materials like drywall sheets, insulation, and sealants. This is the stage where you’ll calculate all the drywall you’ll need based on measurements.

First, assess the existing basement layout to establish a functional design that maximizes space without compromising structural integrity. For those dealing with an unfinished basement, it’s essential first to confirm that all aspects meet local building code requirements, which can vary greatly by region.

These codes address critical safety standards, including ceiling height, emergency egress, and electrical installations. Additionally, a preliminary inspection should be conducted to identify any moisture issues, as these can undermine the structural integrity if not addressed early in the planning process.

Addressing Moisture Issues in Your Basement

Before commencing any physical renovations, addressing moisture issues in your basement is a fundamental step. Identifying and resolving moisture problems in your basement guarantees a durable and healthy environment.

Seal cracks, install interior drainage systems, and consider using mold-resistant materials, such as drywall, to finish walls. Combine that with rigid insulation and vapor barriers to keep natural light from being overshadowed by mold issues.

Begin by inspecting for signs where moisture appears, such as damp walls or pooling water near corners or the ground. Implementing basement waterproofing techniques, such as applying sealants or installing drainage systems, can prevent water ingress.

Additionally, insulating the basement walls plays an essential role in maintaining a dry space. Use rigid foam or spray foam insulation, and always include a vapor barrier to block moisture from penetrating the interior.

These proactive measures form the bedrock of a successful basement renovation, safeguarding against potential water damage and mold growth over the long term.

Understanding Local Building Codes and Permits

Understanding local building codes and permits is vital when planning your basement renovation project. These regulations guarantee that diy projects and wall and ceiling installations meet safety standards, particularly concerning electrical work and plumbing systems.

Before starting, consult your local building department to understand specific requirements for a finished basement. This step not only helps in obtaining the necessary permits but also in preventing potential legal and safety issues.

Compliance with building codes also greatly affects the future insurance and resale value of your home. Detailed plans should include all modifications to the structure, electrical, and plumbing systems, ideally prepared by a qualified professional.

Whether you’re turning your basement into a rec room, bathroom, or additional living space, make sure to follow building code rules. Many municipalities require permits for electrical, framing, and HVAC installations, especially when the project impacts the main floor layout or involves egress windows.

Prepare floor plans showing how you’ll use the square footage, and be prepared to demonstrate that you’ve accounted for proper ventilation, ceiling heights, and safety exits.

What Are the Best Practices for Basement Walls?

Proper framing and drywall installation enhance the structural integrity and aesthetics of the space. Moving forward with the right materials ensures a significant amount of improvement in both function and appearance.

Additionally, implementing long-term moisture prevention strategies is essential to protect against potential water damage and mold growth, especially in the rest areas of the basement near the ground and corners where moisture tends to collect.

Choosing and Installing Insulation

Energy-efficient insulation helps regulate temperature and prevents moisture issues. Use foam boards and ensure tight seals between sheets. Always install insulation before hanging drywall sheets, and secure everything using a nail gun for a quick and clean finish.

Insulation boards, particularly those made from polystyrene or foam insulation, are a good choice for basement environments. These materials are not only resistant to moisture but also offer a warm thermal barrier.

When installing insulation, please make certain that it extends from the top of the basement walls down to the concrete floor, creating a continuous thermal barrier. This method prevents any thermal bridging, which can occur when heat bypasses the insulation through the building materials.

It’s important to secure the insulation boards tightly against the basement walls to avoid gaps that can lead to energy losses and moisture ingress. Putting insulation carefully on every side and section ensures better protection.

Framing and Drywall Installation Tips

After selecting and installing the proper insulation for basement walls, the next step in basement renovation is framing and installing drywall.

For drywall, start by hanging full sheets horizontally and fill gaps with joint compound. Check for protruding screw heads and sand them flush for a professional finish. Make sure all the drywall is securely fastened and free from warps to ensure clean paint application later.

When it’s time to install drywall, begin by measuring and cutting the boards to fit the frame, paying close attention to openings for windows and doors.

Hanging drywall involves positioning the panels against the studs and securing them with drywall screws spaced about 8 inches apart. This process not only covers the framing but also adds a layer of fire resistance and noise insulation to your basement walls.

This course of action, although it may take hours, will deliver a smooth, finished surface that is ready for painting or further refinishing.

Long-Term Solutions for Preventing Moisture in Basement Walls

Guaranteeing the long-term dryness of basement walls is essential for the structural integrity and air quality of a home.

Preventing moisture in your basement is pivotal to avoiding mold growth and structural issues. Proper sealing of basement walls against external water sources is critical. Use waterproofing coatings and membranes specifically designed for below-grade applications to create a moisture barrier.

Additionally, drainage around the home’s foundation should be improved to prevent water accumulation. Before painting your basement walls, verify they are thoroughly dry and treated with anti-mold paint to further protect against moisture ingress.

Check wall insulation and fill dips deeper in the concrete slab before flooring installation. Every small detail makes a difference when trying to create a truly dry, livable basement.

How to Choose the Right Basement Flooring?

Choosing the right basement flooring begins with understanding the various concrete floor options available, which offer durability and moisture resistance essential for below-grade spaces. When selecting, keep in mind budget friendly basement materials to help save money while still achieving quality.

Installing new flooring over existing basement concrete requires careful preparation and selection of materials that can handle potential moisture issues, especially around concrete walls. Properly preparing the bottom plate and using plywood or moisture-resistant underlayments can help reduce condensation and moisture damage over the decades.

Additionally, maintenance tips for basement flooring guarantee longevity and preserve the aesthetic appeal of the investment. Regularly inspect floor joists and address any pressure points or condensation early to avoid costly repairs later.

Understanding Concrete Floor Options

When considering basement renovations, selecting the appropriate flooring is essential, particularly when dealing with concrete floors. The scope of work often includes dealing with uneven surfaces, which may require a skimmed concrete overlay to provide a smooth base.

For those finishing a basement floor, understanding the intricacies of the surface is imperative. The durability of a basement floor often necessitates the use of concrete screws, which require pre-drilled holes made with a masonry drill. This preparation guarantees the flooring material adheres properly to the concrete base.

When choosing the type of floor using these tools, consider factors like moisture resistance, load-bearing beam capacity, and style preferences — whether you prefer a bright, modern look or an industrial look with exposed structural elements. Properly selected and installed flooring can transform a basement into a functional and aesthetically pleasing new space.

It is important to evaluate the specific requirements of your basement to select the most suitable flooring option that fits within your funds and meets your desired design ideas.

Installing New Floor Over Basement Concrete

Having discussed the importance of preparing a concrete floor for renovation, the next step involves selecting and installing the right type of flooring over the basement concrete.

During a basement renovation, choosing a new floor that complements the overall open floor plan is vital for both aesthetics and functionality. When finishing a basement, consider moisture-resistant options such as vinyl, ceramic tile, or engineered wood, which are well-suited to the typically humid basement environment.

Each flooring type has specific installation requirements; for instance, ceramic tiles need a moisture barrier and a sturdy adhesive, while engineered wood may require underlayment for better insulation and moisture control.

Proper selection and installation guarantee durability and enhance the value of the basement space. For example, installing bottom plates carefully and ensuring all edges are sealed with primer and caulk will help create a permanent moisture barrier and keep the basement finishing long-lasting.

Maintenance Tips for Basement Flooring

After selecting the appropriate flooring for a basement renovation, maintaining its condition becomes paramount to guarantee longevity and aesthetic appeal.

Regular inspection of floor joists and the subfloor is vital, particularly in a basement space where moisture levels can be high. Make certain that any signs of dampness or damage are promptly addressed to prevent structural deterioration.

For routine care, use cleaning products that are suitable for the specific type of flooring installed in your finished space. Avoid using excessive water, especially on materials like laminate or wood, which are susceptible to water damage.

Implementing strategic placement of rugs and mats can also help protect high-traffic areas. Following these maintenance tips for basement flooring makes sure that your basement finish remains durable and visually appealing.

Also, don’t let all the debris from construction sit too long. Sweep and mop regularly with products suited for your flooring type to maintain a clean and safe environment.

What to Consider for Basement Ceiling Installation?

When planning basement ceiling installation, it is essential to determine the appropriate ceiling height and consider the option of a drop ceiling to enhance accessibility and aesthetic appeal.

Addressing the constraints imposed by existing joists and plumbing systems can dictate the extent of modification possible and impact overall project feasibility. These structural and spatial considerations will guide the selection of materials and the insertion of top and bottom plates to frame the ceiling properly.

Using plywood and proper instructions for mounting the ceiling structure ensures a solid and durable installation. Properly connecting all framing elements with clips or nails and using a hammer ensures the ceiling will stand the test of time.

In some cases, leaving ductwork and electric wiring exposed can contribute to an appealing industrial or open floor plan style, which is a popular design idea for modern basements. Keep in mind that ceiling installation is one of the most expensive parts of basement renovation, so spending wisely and planning for the entire project budget can help you save money in the long run.

Selecting the Right Ceiling Height and Dropping the Ceiling

Selecting the appropriate ceiling height and installing a drop ceiling are essential steps in renovating a basement. The ceiling height considerably influences both the aesthetics and functionality of the finished space. Ideally, a basement ceiling should be high enough to create a comfortable, open feel.

However, existing ceiling joists and the desire for a drop ceiling can dictate the final height. A drop ceiling offers easy access to plumbing, ducts, and electrical systems above while still allowing for a polished look. Keep in mind that drop ceilings allow access to those systems, which is helpful if your basement shares circuits with the main floor. They’re also ideal for managing noise transmission and cooling costs.

When planning the basement ceiling, consider the impact of both the ceiling height and the type of drop ceiling on the overall environment and usability of the basement. This careful planning guarantees a functional and visually pleasing finished ceiling. It can also help reduce heating and cooling costs in the long run.

Dealing with Joist and Plumbing Constraints

Maneuvering the constraints posed by existing joists and plumbing systems is a critical aspect of basement ceiling installation.

When planning the ceiling layout, consider the placement of mechanical systems, including plumbing, water pipes, and electrical components. These elements often require easy access and maintenance clearance, influencing the ceiling’s final height and design.

To maximize usable space, strategically design these fixtures by incorporating drop ceilings or soffits in areas with dense mechanical configurations. This approach guarantees that the basement remains functional without compromising the aesthetic or structural integrity of the ceiling.

Additionally, consult with professionals, such as a licensed electrician, to verify that all modifications meet local building codes and standards, thereby enhancing the safety and functionality of the renovated space. Drop ceilings can also help conceal awkward runs of plumbing without reducing too much headroom, which is important for maximizing the comfort of your new room. Use a laser level when aligning ceiling grid lines to ensure good shape and clean lines.

How to Create a Finished Basement Living Space?

Creating a functional floor plan is the first step in transforming a basement into a usable living space, ensuring areas are designated for specific activities while maintaining fluid movement throughout. This kind of basement conversion can increase property value and be a great way to add an extra bedroom, home gym, or even an in law suite.

Next, it is essential to incorporate adequate electrical work and strategic lighting to enhance both the functionality and ambiance of the basement. Hiring a licensed electrician for this part of the job is highly advised.

Finally, choosing the right furnishings will maximize comfort and utility, effectively turning the area into an inviting extension of the home.

Designing a Functional Floor Plan

Designing a functional floor plan for a finished basement living space begins with an assessment of the existing structural elements, such as support columns, utilities, and ingress and egress points. Be sure to mark out dimensions using a pencil and tape measure, and always plan.

Architects and designers must navigate these fixed features to maximize the usability of the space. A well-thought-out finished basement layout not only optimizes additional living space but also integrates effective storage solutions. Baseboards and interior walls should be installed cleanly and aligned with a laser level for a professional finish.

Strategically placing closets and built-in cabinets can help maintain an uncluttered environment conducive to various activities. When deciding how to use your basement, consider zones for different functions, such as a home office, entertainment area, or guest quarters. Incorporate durable materials like vinyl flooring to make the space more resistant to wear and moisture. This also keeps your total cost and labor in check.

Thoughtful planning guarantees that each area is accessible and comfortable, enhancing the overall utility and enjoyment of the newly renovated space.

Incorporating Electrical Work and Lighting

After establishing a functional floor plan for the basement, the next step involves the careful integration of electrical work and lighting, which are key components in transforming the area into a vibrant and usable space.

Professional installation of electrical wiring is essential, guaranteeing that power is efficiently distributed to various zones. Recessed lights can offer a sleek, modern look while maximizing ceiling height.

The strategic placement of light fixtures enhances the ambiance and functionality of the space. Throughout the process, verify that all drilled holes for wiring do not compromise structural integrity. Using shims may be necessary to adjust fixture boxes or wall studs.

The project culminates with a final inspection by a certified, licensed electrician, confirming that the electrical installations meet safety standards and local building codes. Installing switches, outlets, and cables correctly from the beginning will save you money over time. Keep the total budget in mind and coordinate with your general contractor to stay on track.

Furnishing Your Basement Space Effectively

Once the essential electrical and lighting frameworks are in place, the next phase in basement renovation is furnishing.

To effectively transform your basement into a vibrant living space, consider the intended function of the area. If creating a family room, choose comfortable, durable furniture that invites relaxation and accommodates multiple activities. Add rugs or carpet to provide warmth and soundproofing. You may also want to install a fireplace for added comfort.

For a game room, incorporate versatile game tables and ample seating to guarantee it becomes a hub of entertainment. Utilizing modular furniture can maximize the extra space, offering flexibility for various uses.

Modular furniture lets you reconfigure your space easily, especially if your basement doubles as a guest room or rec room. Choose multipurpose pieces that include storage. Adding baseboards and applying caulk to seams will complete the finishing touches.

Thoughtfully selected decor can seamlessly integrate the basement with the overall aesthetic of your home, making it a true extension of your living space. Add a few large mirrors or light-colored decor to reflect natural light, making the space feel bigger. Just remember to leave enough airflow for proper ventilation—essential for both comfort and health. Be sure your HVAC ducts or vents are not obstructed and allow fresh air to circulate. If planning to sell your house, a finished basement can significantly increase your resale value.

Conclusion

In summary, renovating a basement requires careful planning and execution. Begin by evaluating the space and addressing any moisture issues. Opt for materials suitable for basement conditions when selecting wall treatments and flooring. A well-installed ceiling enhances both aesthetics and functionality. By thoughtfully designing the living area, homeowners can maximize usability and comfort. Adhering to these guidelines guarantees a successful transformation of a basement into a valuable and enjoyable extension of the home.

A well-installed ceiling enhances both aesthetics and functionality. By thoughtfully designing the living area, homeowners can maximize usability and comfort. Finishing touches like trim, baseboards, and caulking make a noticeable difference. Adhering to these guidelines guarantees a successful transformation of a basement into a valuable and enjoyable extension of the home. This type of home improvement project, while a difficult task at times, can be tackled successfully with the right plan, tools, and professional advice.

Transforming a garage conversation into an office within a house requires careful planning and adherence to local building regulations. A well-considered design enhances both functionality and aesthetics, incorporating strategic placement of windows for natural light, efficient insulation for comfort, and thoughtful electrical planning for technology needs. Creative use of space guarantees a seamless flow that fosters productivity. By maneuvering through the planning permissions and budget effectively, one can craft a personalized office space that promises extended benefits beyond its walls.

Key Takeaways

  • Consult a structural engineer and local planning authority to ensure compliance with building regulations.
  • Plan a budget that includes costs for materials, labor, and contingency for unforeseen expenses.
  • Design the layout to optimize natural light and include efficient insulation for year-round comfort.
  • Upgrade electrical systems to support office equipment and install adequate heating and ventilation.
  • Consider soundproofing and strategic storage solutions to enhance productivity and organization in the office space.

Creative Garage to Office Conversion Ideas

Before transforming a garage, which may have once been used for a car, into a polished office space, one must first evaluate its structural integrity and suitability for such a conversion.

Establishing a detailed budget and a realistic timeline guarantees the project remains grounded in financial and temporal realities.

Finally, designing an office layout that maximizes the unique dimensions and features of the garage space can create a functional and inspiring work environment.

Assessing Feasibility and Garage Condition

Evaluating the feasibility and existing conditions of a garage is a vital first step in transforming it into an efficient office space.

For a successful garage office, consulting a structural engineer is imperative to assess whether the garage space meets building regulations. This professional can examine the integrity of walls and the need for a damp-proof course, ensuring the environment is conducive to office work.

Addressing the garage door is essential; it may require sealing or replacing to enhance insulation and security. Compliance with local authority and building control is important to avoid future legal complications.

Understanding these factors early helps estimate the conversion cost and set the stage for a smooth transformation.

Setting a Budget and Timeline

After evaluating the structural needs and regulatory requirements, setting a clear budget and timeline becomes the next critical step in converting your garage into an office.

Planning your garage conversion with precision guarantees financial readiness and adherence to schedules, which are essential for a smooth transformation.

Consider these key aspects:

  1. Assessment of Total Conversion Cost: Include expenses for materials, labor, and any planning permission required. This guarantees the budget reflects all possible costs associated with the garage office.
  2. Buffer for Unforeseen Expenses: Always allocate an additional 10-15% of the estimated budget to cover unexpected costs during the project.
  3. Realistic Timeline Setting: Factor in time for obtaining permits, material delivery, and construction phases to create a practical timeline for your garage conversion project.

Do You Need Planning Permission for a Garage Conversion to Office Idea?

Maneuvering the labyrinth of building regulations and planning permissions transforms a simple garage into a sophisticated office sanctuary.

One must first decipher the intricate tapestry of local authority requirements, a foundational step in ensuring your converted space not only inspires but complies.

Securing planning permission is akin to obtaining the key to this domain, releasing the potential to create a workspace tailored to one’s visions and vocational needs.

Understanding Building Regulations for a Garage Conversion

Maneuvering through these regulations is vital to guarantee that your converted garage not only serves as a functional home office but also complies with local laws.

Here are key considerations:

  1. Permitted Development Rights: Often, a garage conversion falls under permitted development, which may not require planning permission if specific conditions are met.
  2. Building Regulations Approval: Essential for ensuring that the building work related to structure, fire safety, insulation, and ventilation meets legal standards.
  3. Lawful Development Certificate: While not always mandatory, obtaining this certificate can be beneficial to confirm that your home office garage conversion is a lawful development.

How to Obtain Planning Permission for Your Conversion Project

Often, transforming a garage into a room dedicated to office work requires you to seek permission from your local planning authority. Before initiating your conversion project, it is important to determine whether your specific office garage conversion ideas fall under permitted development or if they necessitate a formal planning application.

While some garage conversions may be achieved under permitted development rights, more extensive changes typically require planning permission to guarantee compliance with building regulations and regulations for garage conversions.

Engaging early with your local planning authority can clarify necessities and streamline your project, preventing potential legal and structural setbacks associated with permission for a garage conversion.

Common Planning Authority Requirements for Garage Office Conversions

Understanding the local planning office’s protocols is crucial. Here are key considerations:

  1. Planning Permission for a Garage: Often required if the garage conversion alters the building’s exterior or its use from storage to habitable space.
  2. Building Regulations: Verify the garage into a habitable room meets specific safety, insulation, and accessibility standards.
  3. Neighborhood Guidelines: Local rules may dictate aesthetics or impact assessments, especially if the garage conversion adds value by altering the home’s external appearance.

A garage conversion certainly transforms an underused space into a usable room, fostering an elegant home office transformation.

Compliance with these standards guarantees that the conversion can proceed smoothly, aligning with legal and community expectations.

Garage Office Conversion Ideas: What Building Work Is Required?

Transforming a garage into a vibrant office space demands thoughtful consideration of essential building work, such as the integration of robust insulation and efficient space planning.

Achieving an infusion of natural light can greatly enhance the ambiance, necessitating clever placement of windows or skylights.

Addressing these structural and aesthetic elements guarantees the converted space is not only functional but also inspiring.

Essential Building Work for a Successful Office Conversion

When starting a garage-to-office, recognizing the essential building work is important for the transformation’s success.

A meticulous planning phase guarantees that every component is perfectly aligned with the final design.

Here are the important steps:

  1. Insulation and Damp Proofing: Install thorough insulation to maintain a comfortable climate and integrate damp proofing to protect against moisture.
  2. Electrical and Heating Systems: Upgrade electrical work to support office technology and install a modern heating system to guarantee a warm, productive environment.
  3. Ventilation and Lighting: Good ventilation is critical for air quality and energy efficiency, while strategic lighting solutions enhance the aesthetics and functionality of the space.

Each element must be installed with precision, transforming the ordinary into a bespoke workspace.

How to Ensure Natural Light in Your New Office Space

After addressing the foundational elements of insulation, electrical work, and lighting within a garage-to-office, the next step involves optimizing the entry of natural light to create a cozy home office that is inviting and productive.

Integrating ample windows into the design of your new room is essential. In smaller spaces, such as an attached garage, strategic placement of larger windows can dramatically transform a once-dim area into a vibrant home office.

Consider the orientation of the garage conversion relative to the sun’s path. Positioning windows to capture morning or afternoon light can enhance the mood and energy efficiency of the office.

Utilizing skylights can also funnel additional sunlight, ensuring the office is suffused with a stimulating, natural ambiance.

Addressing Insulation Needs in Your Garage Conversion

As you commence converting your garage into an office, addressing insulation needs becomes essential, not only for comfort but also to meet building regulations.

A well-insulated office guarantees a cozy environment conducive to productivity year-round. Here are key considerations:

  1. Walls and Ceilings: Enhance existing structures by adding high-quality insulation materials. This minimizes thermal transfer, maintaining a stable indoor temperature.
  2. Garage Door Space: Replace or retrofit the garage door with insulated panels to prevent air leaks and energy loss.
  3. Garage Foundations: Verify that the floor is insulated against cold and dampness, which is vital for a comfortable and healthy office space at home.

These steps transform a simple garage conversion into a sophisticated and functional home extension.

How Much Does a Garage Conversion Cost?

Starting on a garage conversion reveals a tapestry of costs woven by myriad factors such as materials, labor, and design complexities.

For the budget-conscious renovator, embracing DIY strategies can greatly pare down expenses, offering a creative canvas to tailor a functional yet stylish office space.

Each choice in the conversion process not only impacts the aesthetic appeal but also swings the financial pendulum, making thoughtful planning essential.

Factors Influencing Garage Conversion Cost

Several factors intricately determine the cost of converting a garage into a functional office space, weaving a complex financial tapestry.

Here are some key elements:

  1. Type of Garage: The cost of converting a garage can vary considerably depending on whether it’s an attached, detached, or integral part of the home. Modifications to the average garage structure may require different levels of investment.
  2. Structural Changes: Transforming a garage into a habitable new office space often necessitates substantial modifications such as installing insulation, upgrading the garage floor, and enhancing lighting and ventilation systems.
  3. Permits and Regulations: Complying with local building codes and obtaining the necessary licenses can affect the overall home improvement budget. Each jurisdiction might have specific requirements that impact the garage conversion cost.

Budget-Friendly DIY Garage Conversion Tips

Understanding the myriad factors that influence the cost of converting a garage into an office sets the stage for exploring how to achieve this transformation economically.

A budget-friendly DIY garage conversion can begin with reimagining the old garage door as a chic, glass-paneled entry that enhances natural light, blending the space with the rest of your home.

Utilizing the garage as a storage space smartly can free up the main area, allowing it to become a spare room that doubles as an inspiring home office.

What Are Some Creative Garage Conversion Ideas?

Transforming a cramped garage into an innovative home office presents a creative challenge, but with the right strategy, even integral garages or partial garage conversions can become vibrant, functional workspaces.

This building project calls for smart design solutions that maximise floor space while maintaining comfort and professionalism. Most people are surprised by how much potential lies in what was once a dumping ground or storage space.

Innovative Office Space Solutions for Small Garages

When undertaking a garage-to-office, it’s crucial to implement design strategies that work well in smaller areas. Consider these great ideas for creating a workspace that is as efficient as it is stylish:

  1. Vertical Utility: Use wall-mounted shelves, plasterboard panels, and plastering finishes to enhance aesthetics and functionality. Sockets and electrics should be installed smartly to avoid clutter while ensuring everything is easily accessible.
  2. Multipurpose Furniture: Opt for pieces that provide multiple functions—a desk that doubles as a meeting table, or seating that opens to reveal hidden storage. This is especially helpful when working with minimal space in an integral garage.
  3. Light Maximization: Maximize natural light by replacing the garage front door with glazing or a solid wall with a large window or internal door that leads to the garden or main house. This reduces the closed-in feeling common to garages and significantly improves working conditions.

These approaches ensure that every square foot of the existing structure serves a functional purpose, without needing to knock through or build a full extension. You’ll save money and gain usable space in one go. A garage serves a purpose, enhancing your work environment without the need to expand physically.

Maximizing Garage Space for a Productive Home Office

Maximizing every inch of garage space for a productive home office requires a blend of creativity and strategic planning.

Essential garage conversions transform underused areas into valuable new additional living space that adds value to your own home.

Introducing a new door can redefine the entry, enhancing both aesthetics and functionality. In many integral garage conversions, a connecting internal door is added to provide direct access from the main house, or even to connect to a hallway or living room.

Thoughtful additions like skirting boards add a refined touch, making the new space feel less like a former box and more like a dedicated office.

In conservation areas, obtaining listed building consent is vital to guarantee that modifications respect local heritage guidelines. It’s also worth noting that a contractor may be required to assess whether walls are structurally sound and to manage electrical, gas, and services installations.

Does Converting a Garage into an Office Add Value to Your Home?

Transforming a garage into a sleek, functional office not only redefines unused space but also elevates the property’s market value, especially if it complements the style of the adjoining property.

This addition is often compared with other home extensions, offering a unique blend of practicality and aesthetic appeal.

As homeowners evaluate the return on investment, the allure of a modern home office can indeed tip the scales in favour of a higher valuation, especially if the garage was previously filled with junk or unused stuff.

Understanding How Office Conversion Can Add Value to Your Home

Converting a garage into an office not only repurposes underutilized space but also potentially increases the market value of a home. This transformation can be more than just a simple renovation; it’s an investment in the property’s future.

Key points to evaluate:

  • Increased Functionality: Unlike a single garage or a basic dumping ground, a well-designed office adds practical value, turning a dormant area into a productive workspace—a great idea if you need an extra room, extra bedroom, or business space.
  • Attractiveness to Buyers: Homes with dedicated office spaces often appeal more to prospective buyers, especially in today’s remote-working era. Most garages offer enough width to accommodate a proper desk and storage if the layout is planned well.
  • Cost-Effective Alternative: Opting for a garage conversion can be more economical than pursuing a new extension with a pitched roof or a kitchen conversion, potentially offering a significant return on investment while enhancing the overall property value.

Comparing Garage Into Office Conversions to Other Home Extension Options

While evaluating the value addition of garage-to-office, it is essential to compare them with other home extension options, such as adding a new wing or remodeling existing rooms.

A garage-to-office often requires less structural upheaval. Unlike an extensive addition, the foundational floor and adjoining walls remain, minimizing construction chaos. You won’t need to dig new foundations or create new drainage — a big money and time saver.

The conversion typically involves adjusting the garage door into a solid façade, incorporating adequate plumbing, and refining interior aesthetics with fixtures and finishing to create a functional home office project.

This idea, while preserving the external silhouette of the property, can subtly elevate the value of your property, blending seamlessly without the potential zoning or permitting complexities associated with completely new structures.

Conclusion

Transforming a garage into an office not only optimizes underused space but also enhances property appeal, potentially boosting its market value. This creative endeavor unfolds in various stages, blending aesthetics with functionality and crafting an inspiring workspace tailored to personal tastes and professional needs.

By considering legal requirements, managing costs effectively, and employing innovative design to perfect solutions, homeowners can achieve a seamless blend of form and function — whether from a partial garage conversion, a double garage, or a structurally sound, integral garage.

To find the perfect garage conversion idea for your space, begin by evaluating your personal needs and the specific attributes of the garage. Consider the space’s size, existing layout, and how it can best serve your lifestyle, whether as a home office, gym, or entertainment area. Consulting with professionals and checking local regulations are essential steps. Thoughtful planning guarantees that the converted space will increase function and property value. Exploring various brilliant garage conversion ideas below will reveal more about the potential transformations available.

How Can You Transform Your Space with Converted Garage Ideas?

Exploring the best garage conversion ideas can significantly enhance the functionality of a home.

Converting a garage into a dedicated home office provides a quiet space for work, while transforming it into a gym offers convenient access to fitness.

Alternatively, turning a garage into a home cinema creates a personalized entertainment area for family and friends.

How to Convert a Garage into a Home Office

Converting a garage into a home office offers numerous advantages, including the efficient use of existing space and the potential to increase property value.

When starting on a garage conversion project to create a versatile space for a home office, one must consider the existing structure to guarantee it is conducive to a productive work environment.

Insulating garage walls and installing adequate lighting are essential steps to transform the garage space effectively. Adding a door leading to the main house ensures seamless integration.

Additionally, evaluating the garage conversion cost upfront can help budget for necessary modifications such as electrical upgrades and interior finishing.

Ideal garage conversion ideas often revolve around maximizing the converted garage’s functionality while maintaining aesthetic appeal, ensuring the new home office blends seamlessly with the rest of the residence.

Creating a Home Gym in Your Garage

While many homeowners seek ways to enhance their living space, converting a garage into a home gym has become a popular and practical solution. This garage transformation taps into the potential of an original garage, turning it into a valuable extra room dedicated to health and fitness. The converted ground floor space requires consideration of garage conversion costs and adherence to building regulations, especially regarding ventilation, wiring, and floor reinforcement.

Here’s an overview of key considerations:

ConsiderationDetails
FlooringInstall durable, shock-absorbent garage floor suitable for heavy equipment.
VentilationGuarantee proper airflow to maintain a comfortable workout environment.
EquipmentSelect equipment that fits the space and fulfills workout needs.
Building RegulationsCheck local building regulations for compliance in converted spaces.
BudgetPlan for costs related to conversion, equipment, and maintenance.

A well-planned garage gym enhances a home by providing a convenient and customized workout area, possibly even incorporating a boot room for additional storage and organization. It’s an ideal place to use the space effectively, especially for busy household lifestyles.

Transforming Your Garage into a Home Cinema

If the goal is to create a unique and immersive entertainment experience at home, transforming a garage into a home cinema is an excellent option.

Many garage conversion ideas focus on maximizing new living space. Converting a detached garage or an attached garage into a room designed for viewing films can add significant value and enjoyment.

Garage conversions offer the flexibility to tailor the space to your preferences, whether by installing comfortable furnishings, superior sound systems, or proper insulation for sound and temperature control. Thoughtful design considerations, such as a galleried sleeping area, can make the space multi-functional and support household routines like placing a washing machine nearby for practicality.

Use your garage conversion not just as an extra bedroom, laundry room, or playroom but as a dedicated home cinema that brings the magic of the movies into your home. This style of conversion is a good option for those looking to invest in their home’s long-term functionality and enjoyment.

Do You Require Planning Permission for a Garage Conversion?

When considering a garage conversion in the UK, it’s essential to understand whether planning permission is required.

Various factors, including the scale of the renovation and local regulations, play a crucial role in determining this requirement. Some examples include altering the original structure, installing new brickwork, or making significant alterations that change the use of the garage space.

Ensuring compliance with these requirements helps avoid legal complications and streamlines the building work process. This can include knock-throughs, electrics, or expanding into the garden, all of which may fall under specific planning terms.

Understanding Planning Permission Requirements in the UK

Before starting a garage conversion in the UK, it is essential to understand the requirements for planning permission. Generally, converting a garage into a habitable space falls under permitted development if no significant structural modifications are involved. However, consulting the local planning authority is essential, as local rules vary.

A building notice might be required to guarantee that the conversion meets building regulations, and a building control officer may need to inspect the project.

RequirementDescriptionContact
Planning PermissionCheck if required by local authorityLocal Planning Authority
Building NoticeConfirm compliance with building regulationsBuilding Control Officer
Permitted DevelopmentVerify eligibility for simpler approvalLocal Authority

Consulting these authorities early can streamline your garage conversion project, ensuring it aligns with local standards and common conversion ideas. It also helps prevent issues if your property is located in London or a conservation area, where exceptions may apply.

Key Factors That Affect Planning Permission

Determining whether you need planning permission for a garage conversion hinges on several key factors.

The type of garage—attached, detached, or integral—impacts the likelihood of requiring permission. For instance, converting an integral garage into a living area or habitable space often requires checking the garage’s existing foundations, which could necessitate a planning application.

Conversion ideas that alter the structure’s exterior or increase its footprint typically trigger a planning review process. For example, some garage conversion ideas, exterior changes—such as adding windows, doors, or extending the building—may require formal permission. Similarly, loft conversions that affect shared walls with neighbours might necessitate a party wall agreement. Structural changes like installing new windows, modifying joists, or lowering floor levels to improve headroom must also meet building regulations and undergo compliance checks.

Ultimately, obtaining planning permission guarantees that the transformed space is safe, functional, and legally compliant, enhancing the utility and value of the property. It’s a recommended step if you wish to avoid issues down the road.

How to Convert Your Garage into an Extra Living Space

Converting a garage into an extra living space involves several critical steps, guaranteeing functionality and compliance with local building codes.

Specific design strategies can maximize the use of limited space in smaller garages, making them both practical and aesthetically pleasing. This can include smart furnishing ideas and painting choices that keep the space bright and inviting.

Steps to Convert the Garage into a Living Space

When considering the transformation of a garage into an additional living space, the first essential step is to obtain the necessary permits from local building authorities. This guarantees compliance with local zoning and building codes.

Following that, consider these key steps:

  1. Evaluate Floor Space: Maximize the existing floor space to accommodate the intended function, whether turning the garage into a bedroom, utility room, or adding a kitchenette.
  2. Insulate and Ventilate: Proper insulation and ventilation are vital for comfort and energy efficiency.
  3. Install Utilities: If converting the garage into an annex or additional bedroom, ensure that electrical, plumbing, and heating systems are adequately installed.
  4. Replace Garage Door: Opt for new brickwork, windows, or wall installations to transform the garage door into a more functional component of the new room.

These steps can significantly increase the value and functionality of the home, helping households expand their space without the expense of demolishing or a full extension.

Design Tips for a Small Garage Conversion

Having outlined the basic steps to transform a garage into a new living space, the focus now shifts to optimizing the design of small garages for this purpose.

Light-coloured walls are essential in a small garage conversion to create an illusion of more space and reflect natural light, maximising the area’s brightness, especially helpful if the existing garage lacks windows or an openable area.

Underfloor heating can free up wall space typically taken by radiators, allowing for more efficient use of the width and depth of the garage floor. This can be one of the easiest ways to maintain a sleek look while also increasing comfort.

Utilizing versatile furniture, built-in storage, and decluttering strategies helps maintain a clutter-free environment while providing valuable extra space for belongings, stuff, or storage boxes.

Designing the layout to include a dedicated area for activities like a living room, bathroom, or hallway improves overall functionality. This approach ensures that the garage evolves into a practical and appealing addition to the home, even if it’s not a double garage.

Homeowners often prefer this method as a cheaper, simpler alternative to home extensions, making the most of what’s already there.

What Are the Cost Considerations for a Garage Conversion Project?

Understanding the cost implications is important before beginning a garage conversion. This section outlines expenses involved and strategies to manage them effectively, helping homeowners stay ahead of the game and make smart decisions.

Breaking Down the Cost of Your Garage Conversion

A garage conversion can greatly enhance the usability of a home, but the price depends on several factors. Knowing these is essential, as they impact how much cash or money you’ll need to spend.

Here are key considerations:

  • Construction Expenses: Depending on the complexity of your project, such as installing new walls or altering the concrete slab, costs may vary. A simple box room will be cheaper than a fully constructed space with utilities.
  • Permitting Fees: Your local authority might require permissions or a building notice, affecting the budget. Consulting a contractor early helps ensure this stage is not overlooked.
  • Materials Quality: Investing in premium, strong materials improves durability and enhances resale value, but expect to pay a higher average.
  • Labour Costs: Engaging skilled tradespeople ensures your conversion is carried out professionally, but expect to pay more for honest, experienced workers.

You may encounter other expenses such as waste disposal, security updates, or gas system extensions. That’s why getting quotes from multiple experts is essential.

How to Manage Garage Conversion Costs Efficiently

To manage garage conversion costs efficiently, homeowners must establish a detailed budget for all potential expenses. This foresight is essential when undertaking a garage conversion project as it guarantees that all aspects, from the concrete slab to the final touches of the design for your garage conversion, are covered.

Expense CategoryConsideration
Structural ChangesConcrete floor reinforcement, wall construction
Utilities InstallationElectrical, plumbing, HVAC systems
Finishing TouchesInterior design, exterior alignment

These steps help match your budget to expectations, reducing pressure during the build.

You might even want to explore schemes or grants, particularly if you live in London or conservation areas, to retain architectural style or qualify for sustainability incentives. This plan will allow you to enjoy the transformation without unexpected costs.

Are you keen to make the most of a garage conversion? Consider tackling the project in stages, especially if cash flow is limited.

How Does a Garage Conversion Add Value to Your Home?

A garage conversion can significantly improve a home’s appeal by adding functional square footage and offering a special place for various household needs. Most garages offer plenty of opportunity for repurposing. They are often a good starting point for homeowners wanting to add space without increasing the footprint of their home. Whether you’re adding a bedroom, bathroom, or utility room, every bit of thoughtful design counts.

Choosing the correct type of conversion is essential—it should reflect current market demands and the style of the existing house. For example, including features like an openable area to bring in natural light can make a dramatic difference in visual comparison.

This type of investment offers a greater return when selling the property, especially if your home is located near a common route, the most common route, or in a conservation area.

The Impact of Garage Conversions on the Value of Your Home

While homeowners often consider aesthetic improvements, converting a garage into an additional habitable room can substantially enhance a property’s market value.

Transforming a garage into a new, valuable living space optimizes your garage’s potential and introduces a variety of popular garage conversion ideas to help elevate your home’s appeal and functionality.

By adding a new bedroom or other newly converted space, the impact of garage conversions on the value of your home becomes considerably positive.

Here are several ways this enhancement can be quantified:

  • Increased square footage leads to higher appraisal values.
  • Adding sought-after features like extra storage, new flooring, or additional bedrooms.
  • Attracting a wider variety of potential buyers.
  • Improving the practicality and usability of your home’s space.

Choosing the Right Garage Conversion Idea to Enhance Value

Choosing the right garage conversion idea is vital for maximizing the added value to your home. Popular garage conversion ideas include transforming the space into a home office, games room, additional bedroom, or a kitchen diner for an open-plan living feel.

An integral garage conversion guarantees that the new space blends seamlessly with the rest of your home, maintaining aesthetic consistency and convenient access. This coherence between the garage roof, the garage, and the rest of the house is critical in enhancing the property’s overall appeal and functionality.

In most cases, you may lose some parking or store capacity, but the trade-off is often a more valuable and usable space that better supports family life.

Innovative Detached Garage Conversion Ideas for Modern Living

Exploring innovative ideas for detached garage conversions opens up new possibilities for modern living. A detached garage is often a great option to develop a home office, annexe, or fun space for growing kids.

Turning a garage into a functional and stylish space requires thoughtful planning and design. Key considerations like building regulations approval, permitted development rights, and fire safety are essential for a successful garage conversion.

Transforming Your Garage into a Practical and Stylish Space

Transforming a detached garage into a functional and stylish space not only maximizes your property’s usable area but also enhances your living experience.

Here are four key garage conversion ideas:

  • Create a Multi-Purpose Space: Design an area that serves various functions—work, play, and relaxation—integrating seamlessly with your existing home.
  • Home Bar: Establish a sophisticated home bar perfect for entertaining guests in the comfort of your property.
  • Art Studio or Office: Utilize natural light, proper sound insulation, and insulated plasterboard to make it an excellent spot for creativity or focus.
  • Home Gym or Den: Add mirrors, new windows, and trickle vents to improve ventilation and light for an energizing environment.

These conversions transform the detached garage from mere storage into a dynamic extension of the home.

Key Considerations for a Successful Detached Garage Conversion

Before diving into the conversion of a detached garage into a modern, multifunctional space, it is vital to take into account several key factors that secure the project’s success.

  • Consider the ceiling height and width of your garage to determine if a double garage conversion ideas is feasible.
  • Implementing a damp-proof course is essential to prevent moisture issues and damage.
  • Integrating air conditioning, soundproofing, and electrics guarantees comfort.
  • Maximize natural light and ensure proper drainage.
  • Consult with a design professional or architect and check with your local council if a planning application is required, especially if you live in a listed building.
  • If you’re unsure, it’s worth checking the ultimate guide on conversions or speaking to an experienced garage conversion company or builder.

Future-proofing the space by considering how your children grow or how your needs may evolve can make the conversion even more valuable in the long run.

Conclusion

Transforming a garage into an additional living space offers practical and financial benefits. By carefully considering the purpose of the space, understanding local planning permissions, and budgeting appropriately, homeowners can enhance their living environment and increase their property’s value. Whether integrating an innovative design for a detached garage or optimizing an attached garage, the possibilities are vast, ensuring every homeowner can find a conversion idea that perfectly suits their needs and lifestyle.

Introduction

Office refurbishment can transform workplaces by incorporating multi-functional office furniture, innovative storage solutions, and thoughtful design elements like biophilic integrations to enhance aesthetics and functionality. Flexible layouts, ergonomic furniture, and strategic use of natural light elevate employee comfort and productivity, reflecting the brand’s identity through intentionally designed workplace design. Adopting these ideas maximizes space and sets a strong first impression, creating a dynamic and efficient environment that meets various professional needs. The right places for new furniture and stylish fixtures contribute to an ambience that attracts top talent, clients, and customers alike, while colour psychology and art add a sense of luxury and peace.

How Can You Maximise Your Office Space During a Refurbishment?

Maximizing office space during refurbishment involves strategic planning, detailed research, and the ability to decide on solutions that complement the surrounding environment and business goals.

Techniques such as employing multi-functional office furniture, optimizing vertical spaces, and prioritising better use of space can transform even small offices into efficient work environments. Consider stairs or loft stairs design carefully, as the height and steepness can impact safety and usability.

Additionally, partition walls and thoughtful storage solutions help store materials effectively while minimising distractions and maintaining a clean reception or waiting area that makes a great first impression. Avoid nasty surprises by consulting with experts early in the project and planning the fit-out in stages to minimise disruption.

What are the best office space utilization techniques for small office Refurb ideas?

When refurbishing a tiny space or office, every square inch counts, so an essential guide to space optimization is crucial. Efficient use of space is key in optimizing a limited area; applying principles of flexibility and adaptability lets the employer and employees operate with freedom and focus. From an HR perspective, a well-optimized workspace not only boosts productivity but also enhances employee wellbeing and morale. Utilizing vertical space for storage and incorporating moveable walls or screens can transform the functionality of the workspace, promoting a more dynamic and supportive environment.

Innovative desk area solutions, including sit-stand desks and lockers, and flexible design elements, are essential for maximizing space utilization and employee happiness. Below is a table highlighting effective office design strategies for small office refurbishment ideas, with considerations for acoustics and ventilation to improve wellbeing:

StrategyDescriptionImpact on Space
Vertical StorageUse of upper wall space for shelving and cabinetsMaximizes floor area
Moveable WallsFlexible partitions to alter room sizesAdaptable layout
Multifunctional FurnitureFurniture that serves multiple purposesReduces clutter
Optimized Desk AreasCustom-sized desks to fit spaceEfficient workspace
Design ElementsSmart color and lighting choicesEnhances perception

These workplace design strategies guarantee that even small offices can achieve a spacious and productive environment.

How to Maximise Space with Smart Storage Solutions?

Building on the strategies outlined for optimizing small spaces, smart storage solutions play a significant role in further enhancing spatial efficiency during an office refurbishment.

Effective space planning, along with the ability to carry out recycling and install energy-efficient fixtures, is key to this process, as it ensures that every square foot of the office is used strategically to support both function and style. It also allows businesses to seamlessly transition between different types of work modes and layouts as needs evolve.

By integrating innovative office design ideas that incorporate multi-functional furniture and built-in storage units, businesses can maximize the utility of their workspace. These innovative storage solutions are tailored to fit seamlessly into the interior, preserving decor while enhancing usability and function.

Utilizing vertical space for storage helps free up valuable floor area, making the office appear larger and more organized. Practical office closet refurbishment ideas suggest using flexible storage solutions that can be easily rearranged as needs change, ensuring adaptability and efficiency without compromising design.

As part of comprehensive space planning, these adaptable solutions contribute to a more streamlined, stylish, and sustainable office environment that supports wellness, avoids distractions, and allows employees to concentrate.

How to Use Partition Walls Effectively?

While innovative storage solutions are essential, the strategic use of partition walls can considerably enhance the functionality and flexibility of office space during refurbishment.

Implementing partition walls as part of office refurbishment solutions allows for the creation of adaptable workspaces that evolve with changing office design trends, business goals, and operational needs.

These movable barriers not only optimize space but also contribute to a better working environment by providing privacy, improving acoustics, and creating quiet focus areas without permanent structural changes. In the design and build phase, incorporating partition walls can lead to a more efficient use of space and furnishings in dedicated rooms, enhancing the overall workflow and employee wellbeing, resulting in a more comfortable working environment. This flexibility allows employees to work in a setting that suits their needs, fostering greater productivity and a positive atmosphere in the office.

Ultimately, this approach supports dynamic office layouts, diverse settings, and break areas, aligning with current and future refurbishment objectives to create a more inclusive and productive workplace.

What are the Key Elements of Office Design?

When considering key office design elements, evaluating how ergonomic furniture enhances employee comfort and efficiency is essential. Incorporating colour psychology helps create moods that encourage productivity and relaxation, with blue and green tones frequently used to promote calm and creativity.

The infusion of natural light elevates aesthetics, boosts wellness, and plays an important role in employee engagement and mental health. Thoughtful office space design directly influences worker well-being and overall office dynamics, helping reduce stress and fatigue and improve communication and collaboration across departments.

What Role Does Natural Light Play in the Workplace?

Natural light is essential in our lives, enhancing workplace environments by boosting mood and productivity. Incorporating natural light into commercial office refurbishment is central to the philosophy of biophilic design, which posits that bringing elements of nature into the workplace improves mental health and overall wellbeing.

Any comprehensive full office refurbishment guide emphasizes the importance of natural light as a key design element. Designers often prioritize maximizing natural light when planning a new office space or initiating an office refurbishment project. This not only helps in reducing the reliance on artificial lighting, thus saving energy, but also enhances the space’s visual appeal, creating a more inviting and productive environment.

Office refurbishment services consider the strategic placement of current windows, doors, and light sensors, as well as the use of mirror-like surfaces to enhance the spread of natural light, significantly improving your office interiors and ambience.

How Does Office Space Design Impact Productivity and Well-Being?

Adequate office space design greatly influences employee productivity and well-being—office refurbishments tailored to the needs of your business guarantee that employees can perform at their best.

In light of changes in hybrid working and the rise of hot desking, current office design must be dynamic and versatile. An office refurbishment company can optimize even a tiny existing space through strategic fit-out and refurbishment.

Key elements, such as adding an accent wall or incorporating natural greenery, can revitalize the new space and enhance focus. Office refurb initiatives often incorporate flexible layouts that adapt to various working styles and team sizes, reducing distractions and improving the ability to concentrate.

How to Create a Workspace that Reflects Your Brand Identity?

Creating a workspace that mirrors a company’s corporate identity begins with selecting design elements that are both representative and functional. These important elements should align with the brand’s visual aesthetics and promote its core values and culture.

The initial impression of an office fit-out can influence visitors’ and prospective employees’ perceptions, making strategic design choices essential to uphold the company’s reputation. Including branded artwork, logo-inspired decor, and furniture that complements the company’s ethos encourages a sense of community and pride.

What are the Design Elements that Enhance Brand Identity?

Incorporating design elements that reflect a company’s brand identity transforms an office space into a powerful embodiment of its values and vision. Designers select styles, colour schemes, and fixtures that resonate with the brand’s ethos, creating a visual narrative through furniture, wood finishes, and wall art.

When undertaking office refurbishment projects, designers select different styles and colour schemes that resonate with the brand’s ethos. This customization can transform your new office into a visual narrative of the brand.

Key elements like logo-inspired artwork, interior brand colours, wood finishes, and furniture that align with the company’s image are essential.

Additionally, a new design prioritises open, collaborative spaces that can reinforce a company’s commitment to innovation and teamwork.

How to Make a Positive First Impression with Office Fit-Out?

First impressions are essential when initiating an office fit-out, as they set the tone for visitors and prospective employees. A well-planned fit-out enables a seamless transition with minimal disruption to ongoing business operations, allowing your office to realise its full potential and enhance business performance. At the beginning of any refurbishment, it’s important to identify the different types of tasks required and arrange resources accordingly to optimise workflow, ensuring the office design aligns with and supports your company’s goals.

A well-executed office refurbishment can significantly enhance the perceived value of a business, providing more space and improved functionality that avoids reduced productivity. This can have a significant impact in the long run, especially if you have the buy-in from people across all departments.

To achieve this, consider the following range of elements in your design:

  • Lobby Design: Invest in high-quality materials and unique design elements that match your brand identity at the entrance, such as a stylish waiting area that sticks in the memory.
  • Consistent Theme: Guarantee that the interior design is consistent with your brand preferences, colour scheme, and logo throughout the workspace to create bright, welcoming surroundings.
  • Functional Layouts: Optimise the space for aesthetics and functionality to improve the workflow within the existing office. For instance, cubicles can be sectioned off or split to create versatile positions that serve different types of work.
  • Lighting and Furniture: Choose modern, visually appealing new furniture and strategic lighting to brighten the overall ambience of your refurbished office, enhancing concentration and reducing frustration from poor visual conditions.

What are Popular Office Refurbishment Trends?

Discussing trends is key to staying aware of how office refurbishment evolves. Prominent trends reshaping workspaces include biophilic design, hybrid workspaces, wayfinding, and the integration of innovative office technology. These trends focus on wellness, efficiency, and adaptability to support evolving business and employee needs.

Incorporating elements of biophilic design not only enhances aesthetics but also boosts worker well-being, addressing how natural elements can be integrated into office environments to improve mood and reduce stress. Additionally, the rise of hybrid working spaces and innovative office technologies demonstrates a shift towards flexible spaces and efficiency-driven designs.

How to Implement Biophilic Design in Your Office?

Implementing biophilic design enhances workspace aesthetics and boosts wellbeing by incorporating natural elements such as plants, natural light, organic materials, and green spaces. This approach creates inspiration and peace, fostering a productive environment that reduces distractions and distracted thinking. By incorporating elements of nature, this approach can transform a sterile office into a vibrant, inspiring space.

Here’s how to bring biophilic design into your office:

  • Integrate plants: Position them strategically around the office to improve fresh air quality and provide visual interest.
  • Maximise natural lighting: Design workspaces to maximise natural light, reducing reliance on artificial lighting.
  • Create dedicated quiet focus spaces that offer a tranquil environment where employees can relax or focus intensely.
  • Incorporate natural materials: Use wood, stone, or bamboo for furniture and decorations to enhance the connection to nature.
  • Include informal meeting spaces and collaborative zones to encourage movement and interaction.
  • Ensure adequate storage and plenty of power outlets to support daily tasks and applications.
  • Improve space utilisation to avoid dead spaces and create enough room for hot desks and different teams.
  • Prioritize energy-efficient solutions like air conditioning systems and automated lighting to save money and reduce environmental impact.

What Are the Advantages of Hybrid Workspaces?

Hybrid workspaces offer many benefits, such as flexible work arrangements, efficient use of office space, and the ability to cater to diverse employee needs. These spaces support collaboration and privacy by incorporating elements like meeting rooms, office alcoves, and partitions, helping to shape an environment that supports varied working styles.

Incorporating home office ideas into the work-from-home setup can further improve office space, making it more adaptable to the shifting dynamics of today’s work culture. This might include decorating with ergonomic furniture, smart lighting, and calming color palettes. Hybrid working spaces consequently become pivotal in fostering a productive and flexible work environment, positive impact employee retention and overall satisfaction.

While implementing these updates, companies may need to spend both time and resources wisely to ensure the transformation is complete and aligned with their goals. It’s important to let employees rest in thoughtfully designed breakout areas, which help reduce burnout and encourage better focus during working hours.

Leaders who are concerned with long-term growth and staff wellbeing understand that hybrid spaces must be designed with flexibility in mind. The present trend shows a growing preference for personalized spaces, and many employees prefer working environments that offer both collaboration and solitude, achieved whilst maintaining a modern aesthetic.

With the right planning and knowledge, businesses can create spaces where innovation and comfort coexist. When changes happen, the aim should be to enhance both productivity and morale. Ultimately, hybrid workspaces aim to provide a dynamic setup that evolves alongside the workforce’s needs.

How Can Smart Office Design Enhance Your Workspace?

Building on the concept of hybrid working spaces, innovative office interior design is pivotal in further enhancing workspace efficiency and aesthetics. Modern offices are no longer just a place to work—they are strategic environments that reflect company culture and support evolving work styles.

Office design ideas for small offices focus on maximizing space whilst maintaining comfort and functionality, such as using multi-functional furniture, integrating vertical storage solutions, and designing flexible workstations that can be adapted as needs change.

At this point, it’s important to note that the design process isn’t just about aesthetics—it’s about creating a functional environment that aligns with your business goals. The strategic arrangement of a smart office not only revitalizes the interior and study space but also inspires imagination, making the new office space more adaptive and engaging.

With the integration of workplace technology and input from professional workplace consultancy services, organisations can create environments that enhance collaboration, efficiency, and workplace wellbeing. It’s worthwhile to spend time evaluating different models of office layouts to determine what best suits your team’s workflow.

Here are different ways clever office design can enhance a new workspace:

  • Ergonomic layouts: Optimizing office furniture and workspace layout to support posture and movement, which helps boost staff morale and overall productivity. A carefully chosen furniture line can make a significant difference in both comfort and style.
  • Integrated technology: Embedding office equipment solutions for seamless connectivity and collaboration, which is especially valuable for teams like the marketing team, who thrive on fast-paced, creative workflows. One thing to remember is that every system implemented should be easy to use and serve a clear function.
  • Dynamic work areas: Creating dedicated spaces that adapt to various activities and team sizes, making flexibility a key priority in office planning. Tucked into larger open-plan spaces, these zones can support anything from focused work to casual collaboration.
  • Aesthetic and functional lighting: Utilizing lighting that adjusts to the time of day and work requirements, boosting mood and productivity while enhancing the visual appeal of the space. Lighting design should cover both individual needs and group settings to avoid fatigue and eye strain.

When planning these elements, it’s common for businesses to worry about costs and disruptions. That’s why it’s essential to inform your team early, involve them in the process, and advise them on any upcoming changes. A collaborative approach can potentially improve buy-in and make the transition smoother.

How to Design a Functional Office Dining Room for Employee Comfort?

To create a functional office dining room that maximizes employee comfort, attention must be given to both spatial design and aesthetic appeal. The design process should foster a welcoming environment where employees feel relaxed and valued—a critical factor in improving employee retention.

Choosing furniture that supports comfort and good posture is essential. Tables and chairs should be versatile and accommodate various group sizes, promoting both individual and team lunches. Even a brief lunch break in a well-designed space can make a big difference to overall morale.

Regarding refurbishment ideas, integrating fresh air and soothing colour schemes can enhance the mood and energy of the space. Modern teams increasingly expect this type of environment and play a part in how organisations form their culture and values. Businesses might hire external consultants or interior designers to help shape the outcome.

Functional elements like durable, easy-to-clean surfaces and efficient layouts encourage usage and maintain cleanliness. Over the weeks following a redesign, gathering data from employees about their dining experience can help refine the space further. If some needs remain missing, further adjustments can be prompted.

Incorporating digital menus, feedback stations, or easy access to nearby libraries or community resources can add value to the dining experience. Especially in large cities like London, where office environments are competitive, thoughtful dining areas can deliver a strong message about workplace wellbeing and employee care.

Dining spaces are commonly overlooked in office fit-outs, but when given proper attention, they become hubs of interaction and relaxation. Whether it’s a quick walk for coffee or a shared meal with a colleague, these small moments contribute to a larger culture of respect and care, one that employees hope to find in a modern workplace.

When considering such changes, aligning them with your company’s finance strategy ensures the investment is sustainable and beneficial long term.

How to Plan an Effective Office Fit-Out?

Planning a cost-effective back office fit-out requires a clear roadmap and selecting a competent fit-out contractor. Whether you’re starting from scratch or rethinking your current setup, it’s important to define your objectives clearly to ensure a smooth process.

Understanding the sequential steps involved in a refurbishment project is essential to verify that each phase aligns with strategic business objectives. At the start, take time to gather insights from employees and leadership alike—this ensures the design keeps everyone’s mind at the forefront, promoting better collaboration and engagement.

Choosing the right company involves evaluating their experience, portfolio, and understanding of your needs to guarantee a successful transformation. For example, suppose you’re looking to redesign an open plan space. In that case, the company must have a proven track record in creating versatile, functional layouts that maximize space while maintaining an inviting and collaborative atmosphere.

If your team feels tired or disengaged, the office design might need updating. A fresh, well-thought-out workspace can unlock new opportunities, turn performance around, and help visualise future growth. Be ready to listen to staff feedback—this small action can make a big difference.

By returning to the basics of effective design and project planning, and staying flexible when moving through each phase, your office fit-out can become a testament to your company’s achievements and long-term vision.

What are the Steps for a Successful Office Refurbishment Project?

Initiating an office refurbishment project requires a clear and structured approach to guarantee success. The thing to remember is that successful outcomes depend on careful planning and adaptability throughout the process.

To transform your current space effectively the first time, follow these essential steps:

  • Assess needs and goals: Evaluate required improvements by considering both functionality and aesthetics. Taking the time to understand how people use the space helps identify what’s worth improving and what can remain unchanged.
  • Enhance productivity and branding: Determine how the new design will boost efficiency and reflect the company’s brand image. Adding a touch of personality through branding can make the space feel more connected to your culture.
  • Develop a detailed plan: Outline specific interior changes, including spatial layouts and material selections. A variety of options can be considered, depending on your business model and future ambitions.
  • Plan for future needs: Ensure the design accommodates both current and evolving needs of the workplace. It’s a fact that companies grow and change over the years, so building flexibility into your design is crucial.
  • Set a realistic budget: Estimate costs for all aspects of refurbishment, balancing financial resources without compromising quality. This part may seem difficult, but it’s essential to get it right to avoid issues coming up later.
  • Choose sustainable materials: Opt for eco-friendly options to enhance the office environment and support sustainability in commercial refurbishment. In addition to environmental benefits, these choices are increasingly becoming industry standards, offering long term benefits such as reduced maintenance costs, improved employee well-being, and enhanced brand reputation

Throughout the project, it’s important to remain aware of insurance requirements, tenants’ needs, and any mechanical or ceiling considerations on site. Contact your chosen contractor regularly to discuss progress and review any challenges. If hundreds of decisions feel overwhelming, keep in mind that expert help is available to guide you.

By following these guidelines, you can avoid frustration and find the perfect balance between form and function. It may be hard work at times, but with a solid plan in hand, the chance of success increases quickly. As shown in many successful refurbishments, strategic updating makes a powerful impact—one that’s definitely worth the investment.

Conclusion

In summary, optimizing office space through strategic design and refurbishment enhances functionality and reinforces brand identity. A well-designed office directly supports business operations by improving workflow efficiency, employee satisfaction, and overall productivity. Key elements of office design ideas, including sit-stand desks and effective layout planning, play pivotal roles. Keeping abreast of current trends, such as biophilic design, living walls, and flexible workspaces, guarantees a modern office and engaging environment. Key elements of office design ideas, including sit-stand desks and effective layout planning, play pivotal roles.

Keeping abreast of current trends, such as biophilic design, living walls, and flexible workspaces, guarantees a modern office and engaging environment. Thoughtful office fit-out planning and project management are essential for achieving a seamless transformation that aligns with aesthetic and practical business objectives.

To ensure a smooth process, engaging a reliable project team and facilities manager is vital for coordinating installation and maintaining minimal disruption. Incorporating glass partitions in an open plan office supports collaborative settings while helping to control noise levels. Additionally, creating relaxation rooms and breakout areas fosters wellbeing and creativity, which has a significant impact on employee retention and job satisfaction.

To successfully undertake a loft conversion, begin by evaluating your attic space’s structural integrity and potential. Consult with professionals to understand planning permissions and building regulations. Budgeting accurately is vital as costs can vary based on design complexity and materials. An open floor plan with light hues can enhance the visual space. Ensuring compliance with safety standards is essential throughout the process. Pursuing more detailed guidance can further smooth your loft transformation journey.

What is a Loft Conversion?

A loft conversion transforms an existing attic into a functional room for bedrooms, offices, or entertainment areas.

This renovation can vary in style and complexity, ranging from simple roof light conversions to more elaborate dormer or mansard conversions.

Understanding the potential uses and benefits of such a transformation can help homeowners make informed decisions about maximizing their living space.

How Can You Utilize Your Loft Space

While many homeowners may overlook the potential of their uppermost spaces, a loft conversion can transform this often-underused area into valuable living quarters. Converting a loft maximizes the existing space by creating more usable or livable regions. The good options are versatile for an additional bedroom, a home office, or a cozy lounge area.

PurposeBenefitsConsiderations
BedroomAdds value to your homePrivacy needs
Home OfficeReduces clutterLighting
PlayroomUtilizes vertical spaceSafety features

This transformation not only enhances the functionality of your home but also dramatically increases its market value, offering a lucrative return on investment. Each loft room proves the clever use of existing loft space.

What Are the Different Types of Loft Conversions

Familiarizing yourself with the various types of loft conversions can assist many homeowners in deciding which design suits their needs and best suits their home structure.

Dormer loft conversions extend the existing roof slope to more space in your home, usually at the rear, creating additional headroom and flat ceiling space.

Mansard loft conversions alter the roof structure more dramatically, changing the roof slope to an almost vertical 72 degrees, and are often seen in urban areas.

A hip-to-gable loft expands the sloping side to a vertical gable end for homes with a hipped roof, maximizing the internal loft space.

Simple internal loft conversions involve adding skylight windows without altering the existing roofline.

Each type of loft conversion design necessitates different considerations for loft conversion stairs and overall integration with the home.

What Are the Benefits of a Loft Conversion

Exploring the benefits of a loft conversion reveals how homeowners can considerably enhance their lives in a conversion. Undertaking a loft conversion project not only optimizes the existing living space but also adds significant value to the property. By consulting a loft conversion specialist and carefully planning loft conversion designs, homeowners can guarantee a successful loft conversion that aligns with their needs.

BenefitDescriptionConsideration
Increased Property ValueAdds substantial market value.Consider loft conversion cost.
Additional Living SpaceConverts unused attic into functional new loft space.Plan with loft conversion plans.
Customization OpportunitiesTailors space to specific preferences and needs.Engage a loft conversion specialist.
Enhanced Energy EfficiencyImproves insulation and heating efficiency.Factor in loft conversion design considerations.

This strategic enhancement not only broadens the utility of a home but also prepares it for future loft conversions and extensions.

Is Planning Permission Required for a Loft Conversion?

Determining whether planning permission is required for a loft conversion is vital before commencing any work.

Homeowners may find that smaller, less intrusive projects can proceed under permitted development rights, bypassing formal approval.

However, adherence to building regulations and engagement with building control are mandatory to guarantee safety and compliance.

When Planning Permission is Necessary

When considering a loft conversion, it is vital to determine whether planning permission is required. This depends on several factors, including the structure and the extent of modifications planned. In many cases, loft conversions in a semi-detached house may fall under permitted development, alleviating the need for formal permission. However, consulting with a building control officer is essential to guarantee compliance with building regulations.

FactorDescriptionRequires Permission
Extension beyond roofExpanding the loft beyond the existing roof planeYes
Structural AlterationsChanges affecting the building’s structureYes
Roof Height ModificationAltering the height or shape of the existing roofYes
Listed BuildingConversions in a heritage-listed propertyYes

Can You Convert Your Loft Under Permitted Development

Many homeowners wonder if they can convert their loft without obtaining planning permission. Not all loft conversions require planning permission, but it’s crucial to determine if your project—whether you plan to convert loft space, renovate the loft space, or refurbish the loft area—qualifies under these rights.

Permitted development rights may allow you to convert the loft without this, depending on the loft conversion type and specific local regulations. Not all loft conversions always need planning permission; however, it is vital to determine if your loft qualifies for a conversion under permitted development rights.

Factors such as the extent of the alterations and the useable space in your loft can influence this. To guarantee compliance, thorough planning of a loft conversion is essential.

Before proceeding, consult with local authorities to confirm what is required for a loft conversion in your area. This verification is key to understanding which type of loft conversion you could undertake legally.

Building Regulations and Building Control

Understanding whether a loft conversion requires planning permission is the first step; verifying the project complies with building regulations is equally important.

Building control will scrutinize the conversion to verify it meets specific criteria, including fire safety measures such as installing fire doors and mains-powered smoke alarms.

A structural engineer must confirm that the load-bearing walls and floor structure can support additional weight. Adequate head height is another critical requirement to take into account.

The building control officers will conduct inspections throughout the process, with a final inspection necessary to certify compliance.

Adhering to these regulations guarantees the safety and legality of the loft conversion, protecting your investment and well-being.

How Much Does a Loft Conversion Cost?

The cost of a loft conversion can vary widely based on several factors. In the UK, pricing for these projects can vary based on the right size, design, and materials used.

Understanding these elements is essential for effectively budgeting and planning your loft conversion.

What Factors Influence Loft Conversion Costs

While determining the cost of a loft conversion, several factors come into play, each considerably impacting the overall budget.

The conversion’s complexity and your loft’s size are significant determinants. More intricate designs, such as a dormer or mansard conversion, typically require more extensive construction efforts, including adding a new floor or structural reinforcements.

A mansard loft conversion involves altering the roof structure extensively, which can escalate costs. Additionally, the level of loft extension and the need for enhanced loft conversion insulation for energy efficiency and sound insulation also contribute to the financial outlay.

Ultimately, building a loft conversion in the UK varies widely in cost due to these diverse factors.

How Much Does a Loft Conversion Cost in the UK

Given the factors above, estimating an average cost for a loft conversion in the UK can be challenging; however, typical expenses range from £20,000 to £60,000.

These costs are influenced by:

  • Existing Roof Structure: Modifications to accommodate a new loft conversion might be the most expensive option.
  • Roof Windows: Installing these can affect the overall loft conversion cost.
  • Floor Space: Larger areas typically mean higher costs.
  • Roof Pitch: The steeper the pitch, the more complex the conversion, especially for mansard conversions.
  • Specialist Loft Conversion: Hiring a conversion company will be essential for complex projects like a DIY loft conversion, potentially adding to the cost.

Budgeting for Your Loft Conversion Project

Understanding the varied factors contributing to the cost of a loft conversion is essential when setting a budget for your project. The condition of the existing roof and the need to strengthen the floor joists impact initial expenses. A loft conversion is often pursued through a step-by-step guide, ensuring each phase adheres to budget considerations. The quality of the conversion and the desired functionalities of the new space also play significant roles in overall costs. Here’s a breakdown:

Cost FactorImpact on Budget
Existing Roof ConditionHigh if repairs needed
Floor Joists StrengtheningNecessary expense
Quality of MaterialsVaried
Desired FunctionalitiesCustomizable

Careful planning of your loft conversion aspects will likely lead to a more predictable expenditure.

How to Plan Your Loft Conversion?

Planning a loft conversion involves several essential steps, starting with understanding the key design considerations that can impact aesthetics and functionality.

Choosing the right conversion type—whether a dormer, hip-to-gable, or mansard—depends on the existing structure and desired outcome.

Consulting with an architect or a specialist company can provide tailored advice and guarantee that the project complies with local building regulations and optimizes the available space.

What Are the Key Loft Conversion Design Considerations

When planning a loft conversion, several key design considerations must be addressed to guarantee the success of the project.

Careful evaluation of the existing roof structure and its potential for transformation into valuable habitable space is essential. Making sure there is adequate headroom in the loft and installing dormer windows can greatly enhance usability and natural light.

  • Maximise Natural Light: Consider adding single dormers windows or skylights to increase sunlight.
  • Evaluate Structural Integrity: Assess the capacity of the loft floor to support additional weight and any structural changes.
  • Optimize Headroom: Plan for sufficient headroom, especially near sloping ceilings, particularly in pitched roofs.
  • Incorporate Storage: Utilize gable wall areas and eaves for maximise storage solutions.
  • Ventilation: Ensure proper airflow to maintain a comfortable living environment and support energy efficient conditions.

Choosing the Right Type of Loft Conversion

After considering the key design elements of a loft conversion, homeowners must next select the appropriate type of conversion to suit their specific needs and the structural limitations of their home.

For those with a modern trussed roof, commonly found in modern homes, the attic conversion might require newly installed beams to support alterations.

An internal loft conversion, ideal for minimal disruption, can work under existing roof structures without altering the roofline.

More extensive renovations might opt for a full-width dormer, which provides substantial additional space with a flat roof extension projecting from the slope of the original roof.

Each type demands careful consideration of roof tiles and structural integrity to guarantee the conversion enhances the home efficiently and safely.

Working with an Architect or a Specialist Company

Engaging a skilled architect or a specialist company is essential to guarantee a successful loft conversion. They provide the expertise necessary for a loft conversion effectively, ensuring it meets legal standards and optimizes space.

Remember, a loft conversion or attic remodeling is a complex process.

  • Design Expertise: Architects can maximize the utility and aesthetics of the space, ensuring enough space is maintained even with internal stud partitions.
  • Structural Safety: Assures the conversion is often structurally sound, especially when chimney stacks, internal struts, or new partition wall placements are involved.
  • Regulatory Compliance: Helps navigate fire safety regulations, permits, and party wall agreement if shared walls are involved.
  • Customization: Tailors the design to suit personal needs, whether adding a bathroom, office space, or an extra bedroom.
  • Access Solutions: Plans the best way to install a new staircase or enhance access through trap or landing spaces.

Choosing professionals will help ensure that the loft conversion is a cost-effective and legally compliant investment..

What are the Steps to Convert Your Loft?

Converting a loft begins with evaluating and preparing the existing roof structure to guarantee it can support the new space.

Installation of roof lights or dormer windows follows, bringing natural light into the loft while enhancing its architectural appeal.

Finally, strategic design is essential to maximise the usable space within the loft, making it both functional and aesthetically pleasing.

How Do You Prepare Your Existing Roof Structure

Before initiating a loft conversion, assessing the existing roof structure is essential to confirm that it can support additional modifications. This preparation is critical, especially in semi-detached houses where shared party wall elements may affect structural integrity.

  • Inspect the Roof: Check for signs of damage or wear that could impact the project.
  • Consult a Structural Engineer: Verify that the load-bearing capacity suits the planned changes, including ceiling plasterboard, skirting boards, or light fittings.
  • Plan for Changes: Consider the need for a vertical wall, new staircase, or reinforcement if expanding the space.
  • Address Accessibility: Determine if an external door or a new entry point is necessary.
  • Review Building Codes: Verify all modifications comply with local planning rules and safety regulations, including fire protection and escape routes.

How Can You Install Roof Lights or Dormer Windows

After preparing the roof structure, installing roof lights or dormer windows is vital in many loft conversions that enhance natural lighting and increase usable space.

To begin, choose the type and size of windows that best fit your loft’s architectural style and your personal needs.

For roof lights, cut an opening in the roof sheathing, reinforce the surrounding rafters, and install the window unit according to the manufacturer’s instructions.

Dormer windows require more complex construction, involving the cutting of the roof to form a vertical wall (dormer), framing the structure, and then installing the window.

Proper waterproofing, loft conversion insulation, and soundproofing around both types of windows are essential to prevent leaks and guarantee energy efficiency.

How Do You Maximize the Space in Your New Loft

Maximizing space in your new loft involves strategic planning and clever design choices.

Utilizing every inch effectively can transform your attic into a functional and stylish area. Here are essential steps to contemplate:

  • Utilize Built-In Storage: Incorporate built-in shelves and drawers to reduce clutter.
  • Choose Multifunctional Furniture: Choose multifunctional furniture, like a sofa bed or an ottoman with storage.
  • Install Skylights: Enhance natural light and perception of space with strategically placed skylights.
  • Keep the Layout Open: Avoid bulky partitions; opt for an open floor plan to make the space feel larger.
  • Select Light Colors: Use light hues for walls and floors to reflect light and expand the visual space.

Is a Loft Conversion Suitable for Your Home?

Evaluating one’s skills and resources is essential before deciding on a loft conversion.

Homeowners often face various DIY challenges, from structural concerns to compliance with building regulations.

Determining when to enlist professional help can guarantee the project’s success and adherence to safety standards.

How Do You Assess Your Skills and Resources for a Loft Conversion

Before starting a loft conversion, homeowners must critically evaluate both their personal skill set and the available resources to determine if such a renovation is feasible for their property. Evaluating one’s capabilities and the tools at hand is vital to guarantee that the building work can be completed safely, without unnecessary complications or costs.

To effectively gauge your readiness for a loft conversion, consider the following:

  • Skill Level: Are you experienced in construction or carpentry
  • Tools and Equipment: Do you have access to the necessary tools
  • Budget: Is there enough financial coverage for materials and potential professional help
  • Time Availability: Can you dedicate sufficient time to complete the project
  • Support Network: Do you have contacts for advice or hands-on help

Many loft conversions require more than basic skills, particularly when integrating storage space, handling chimney stacks, or working in a conservation area. Having a good understanding of what’s involved is crucial.

What Are the Common DIY Loft Conversion Challenges

While evaluating whether a loft conversion is suitable for your home, it’s essential to understand the common obstacles that accompany such DIY projects.

One major hurdle is ensuring structural integrity. Many homes require major structural work, especially when adding a dormer conversion, adjusting roof type, or supporting extra space. You may need to remove internal struts, deal with chimney stacks, or install a new partition wall.

Another challenge lies in meeting building regulations, especially those related to fire safety regulations, escape routes, and fire protection. In some cases, party wall agreements are necessary, particularly in terraced or semi-detached houses.

Lighting, headroom, and access are also key issues. Adding new windows, ensuring available head height, or fitting a staircase leading to the loft can complicate even simple conversions.

In short, despite the appeal of a cost-effective option, the complexity and risks of DIY loft conversions should not be underestimated.

When Should You Hire Professionals for a Loft Conversion

Given the complexities outlined above, hiring professionals for a loft conversion is often necessary to ensure the project is completed safely and complies with all planning rules and necessary approvals.

You should hire a contractor when:

  • Structural work or alterations to chimneys, roof voids, or foundations are required.
  • You’re working in a conservation area, or your home is one of many houses built with unique limitations.
  • You lack experience with electrics, plumbing, or soundproofing.
  • You need high-quality finishes such as skirting boards, plastering, and painting.
  • You’re unsure how to manage party wall issues, planning permissions, or building codes.

In such cases, investing in a qualified team reduces liability, increases efficiency, and avoids costly mistakes.

Conclusion

Concluding, a loft conversion can brilliantly transform unused attic storage space back into a functional area, enhancing a home’s utility and value. Before commencing this project, homeowners should carefully consider planning permissions, costs, and the suitability of their existing structure. Proper planning and understanding the step-by-step process are essential for a successful transformation. When executed well, a loft conversion can meet additional living space needs while adding significant value to the property.

Before committing, assess whether your DIY new skills are sufficient for tasks like insulating walls, installing internal stud partitions, or managing water tanks. Consider all costs involved, from plasterboard and light fittings to potential mansard extensions and side dormers.

Whether you’re aiming for a spacious, livable space or simply looking to add cost-effective functionality, understanding the key steps, planning rules, and your readiness will lead to a successful project. And when in doubt, talk to an expert — it’s often the most efficient and beneficial route.

The duration of a kitchen renovation varies, typically ranging from 7-11 weeks, though the exact timeframe depends on the scope and scale of the project. Smaller updates may complete more quickly, while full renovations involve multiple phases, including design, selection, and construction. Factors like material availability, design complexity, and structural modifications can extend this timeline. For more detailed insights into managing these factors efficiently, further exploration can provide valuable guidance.

How Long Does a Kitchen Renovation Take?

Estimating the duration of a kitchen remodel varies by the scope and size of the project.

A full kitchen renovation typically spans several weeks to months, whereas a smaller kitchen might be updated in a shorter time frame.

Factors such as material availability, workforce efficiency, and structural changes can extend this timeline greatly.

How to Renovate a Kitchen and Its Estimated Timeline

The average kitchen renovation can span several weeks, depending on the complexity and size of the project. An effective kitchen renovation timeline includes several key phases: planning, design, and installation. During the planning phase, homeowners decide on the layout and features. The design phase involves selecting kitchen cabinets, new appliances, and new flooring, which can be time-consuming. Finally, kitchen installation includes the physical updating of the space.

Here’s a breakdown of the timeline:

PhaseDurationDetails
Planning Phase1-2 weeksLayout, feature selection
Design Phase2-3 weeksSelect cabinets, appliances, flooring
Installation4-6 weeksConstruction and finishing

While a full kitchen renovation generally takes between 7 to 11 weeks, remodeling a small kitchen often requires less time.

The compressed scope of work and fewer kitchen units involved typically streamline the renovation project, potentially cutting down the project time.

Here are some key aspects that define the timeline for a small kitchen renovation:

  • Planning: Efficient design plans and prompt decision-making.
  • Units: Installation speed due to smaller quantity.
  • Fitter: Coordination and availability of professional fitters.
  • Appliances: Time to select and move appliances into place.
  • Walls: Quicker modifications and finishes are needed due to the lower surface area.

What Factors Affect the Kitchen Renovation Timeline?

Although kitchen renovations can be efficiently planned and executed, several factors can extend the duration of the project.

Structural changes could take significant time, especially if the remodel involves a kitchen extension that alters the original layout.

The size of the kitchen also plays a critical role; larger spaces typically require more extensive electrical work and plumbing adjustments.

Availability of materials can cause delays, as can the integration of complex designs or specific features like custom cabinets or high-end appliances.

Additionally, older appliances might need special considerations for removal and fitting, which can increase the overall cost of renovation due to additional labor or custom adjustments.

Ultimately, the efficiency and experience of the project manager can greatly influence the timeline, as effective management mitigates delays and coordinates tasks seamlessly.

Scope of the Kitchen Renovation Project

The scope of a kitchen renovation project considerably influences the overall timeline, with various factors playing significant roles.

Determining the scope of work is essential as it dictates the extent of renovation work required and impacts the project’s time frame. An average full kitchen renovation involves a series of complex steps that vary based on the project’s specific demands.

  • Extent of Changes: Whether it’s a cosmetic update or a complete renovation. For instance, minor changes can result in a shorter timeline.
  • Size of the Kitchen: Larger spaces may require more time, especially when replacing flooring or tiles.
  • Customization Level: Custom designs may extend the timeline. From templating to fabrication and installing worktops, each stage takes careful planning.
  • Structural Alterations: Moving walls or changing layouts add complexity. Tasks like knocking through spaces or adjusting supports can lengthen timeframes.
  • Material Availability: Delays in obtaining materials can extend the time needed to renovate the kitchen, particularly for modern finishes or custom cabinets.

The Role of Planning and Design

Effective planning and design are essential for setting a realistic timeline for kitchen renovations.

When planning your renovation, the choice of kitchen style, materials, and the desired features for your new kitchen greatly influence the duration. Selecting kitchen suppliers for cabinets and worktops can either expedite or delay the project, depending on their availability and delivery schedules.

A detailed kitchen makeover plan helps in aligning your vision with practical considerations such as budget and space. In addition, a thorough kitchen refit design includes deciding on aesthetic elements and functional utilities that create the kitchen space you envision.

Each decision, from material selection to final design approval, impacts the overall timeline, making early and extensive planning essential. Calendar planning helps in aligning contractor schedules and delivery timelines.

Impact of Structural Changes on Timeframe

While planning and design lay the groundwork for kitchen renovations, the extent of structural changes greatly influences the project’s duration. Major modifications to the layout can extend the timeline greatly, as they often involve altering load-bearing walls, plumbing, and electrical systems.

Factors affecting the renovation timeline include:

  • Extent of demolition: Removing existing cabinets and walls can vary in complexity.
  • Complexity of structural adjustments: Reconfiguring space often requires professional assessment and precision.
  • Permit acquisition: Necessary for significant structural changes, can take several weeks depending on UK regulations.
  • Custom installation needs: Tailored fixtures and cabinets may take several months to prepare and install.
  • Coordination of contractors: Scheduling conflicts during each phase of the renovation can delay progress. This is where staying on top of your calendar becomes crucial.

How Does Kitchen Design Affect Renovation Time?

The selection of cabinets and countertops plays an essential role in determining the duration of a kitchen renovation, as these elements often require precise measurement and custom fitting.

Additionally, the installation of new appliances must be coordinated with these fixtures, potentially extending the overall timeline.

Layout changes, such as altering the position of sinks or stoves, can further complicate and lengthen the renovation process.

Importance of Cabinets and Countertops

In any kitchen renovation, cabinets and countertops are pivotal elements that greatly influence the project’s duration. Selecting and installing cabinets and worktops can redefine both the aesthetic and functionality of a new kitchen. The choices range from prefabricated units to custom solutions, which vary considerably in installation time.

  • Material Selection: Choosing stainless steel kitchen countertops can speed up the installation compared to custom stone cutting.
  • Customization Level: New cabinets designed to fit specific dimensions can extend the timeline.
  • Existing Setup: Modifying old kitchen layouts to accommodate new fittings requires additional planning and labour.
  • Installation Complexity: Cabinets with intricate designs or features like hidden drawers may take longer to install.
  • Budget Constraints: Opting for refurbishment rather than replacement can save money, but might affect the duration if extensive repairs are needed.

Installing New Appliances

As kitchen renovations progress to the stage of installing new appliances, the chosen design notably impacts the timeline.

The installation of appliances is one of the most time-consuming parts of a kitchen renovation. Depending on the scope and complexity of the appliances selected, this phase can extend the overall duration of the project by several weeks.

Appliances are among the biggest expenses and vital elements in determining how long it takes to renovate a kitchen. Each appliance must be correctly integrated into the kitchen to fit the existing space and utility setups, which can vary widely in complexity. This includes working with a plumber and an electrician for proper connection and security.

Completing this stage efficiently requires meticulous planning and coordination, greatly influencing the total time required to renovate a kitchen.

Influence of Kitchen Remodel Layout Changes

Changing the layout of a kitchen considerably affects the renovation timeline, primarily because it often requires alterations to plumbing, electrical, and structural elements.

When planning to remodel a kitchen, understanding the influence of kitchen remodel layout changes is essential. The footprint of your kitchen dictates the complexity and duration:

  • Redesigning Spatial Layout: Moving walls or changing the floor plan extends the kitchen renovation period.
  • Plumbing Adjustments: Relocating sinks or dishwashers impacts plumbing structures.
  • Electrical Rewiring: Modifying kitchen islands or appliance locations necessitates electrical adjustments.
  • Structural Reinforcement: Adding or removing elements might require structural support.
  • Permitting and Inspections: Changes in layout could mean additional permits, where the process can take anywhere from days to weeks, depending on local UK regulations.

Each bespoke kitchen needs careful consideration as both the scope and work can take longer than a standard kitchen remodel. Planning should include contingencies for delivered materials, site access, and possible delays while waiting on components or trades like a plumber or electrician.

How Can Homeowners Reduce Renovation Time?

Homeowners can greatly cut down on kitchen renovation times through meticulous planning and employing efficient design strategies. Verification successful – waiting is no longer the default status when you plan and make smart choices.

Selecting a skilled and reliable kitchen fitter is vital for ensuring that both quality and timelines are met. From plumbing work to adding electrical fixtures, a knowledgeable fitter can make a huge difference in how the renovation unfolds.

Streamlining the project process—from the design process and preparation to execution and finishing touches—further accelerates completion and minimizes delays.

Efficient Planning and Design Strategies

To minimize renovation time, homeowners should focus on meticulous planning and adept design strategies from the outset. Efficient planning hinges on several factors that directly affect the project complexity and renovation timeline.

  • A clear plan for kitchen walls, tiling, and pipework ensures that each phase moves in a straight line.
  • Open shelving is a time-saving choice over traditional cabinetry.
  • Pre-selecting materials avoids waiting for delayed items.
  • The best way to maintain momentum is to create a timeline with milestones and keep track of progress using a shared schedule.
  • Consult with showrooms and contractors to get a sense of realistic timeframes.
  • Don’t forget to obtain permits if your renovation involves major changes like knocking down walls or altering pipes and electrical connections.

Choosing the Right Kitchen Fitter

The choice of a kitchen fitter is essential in determining how long a kitchen renovation takes. Skilled fitters can assess the job’s size and project complexity, accurately estimating weeks to complete. Their expertise guarantees that tasks involved in a kitchen makeover proceed smoothly, avoiding delays that take more time.

Conversely, less experienced fitters might underestimate or mismanage parts of the renovation, leading to extended timelines. Given that kitchen renovations are significant home renovation projects, choosing an adept fitter can streamline the process, reducing the overall duration.

Homeowners should prioritise experience and efficiency when selecting a kitchen fitter to make certain their kitchen transformation is completed within a reasonable timeframe. From pipework to adding electrical connections, an experienced professional will know how to keep the mess minimal, ensure security on site, and maintain control of tasks as they progress.

Streamlining the Renovation Project Process

Selecting an experienced kitchen fitter is the first step in reducing renovation time. Streamlining the renovation project process is essential for a successful kitchen renovation.

Homeowners can considerably cut down the time needed by implementing several strategic actions:

  • Detailed Planning: Outline all steps before starting, including obtaining permits, confirming the design process, and verifying the delivery timeframe of products.
  • Pre-order Materials: Avoid delays by having all materials ready, including pipes, hob, paint, granite, and even finishing touches like handles or lights.
  • Clear Communication: Regular updates between contractors and homeowners help avoid misunderstandings. It’s the best way to reduce stress, maintain connection, and ensure all questions are answered.
  • Simultaneous Tasks: Conduct multiple tasks where possible to save time. For example, plumbing work, templating, and preparation for kitchen walls can occur at the same time.
  • Final Inspection: Schedule promptly to address any touch-ups quickly. A final walk-through should include checks on leaks, matches, and whether everything is signed off.

Factors such as the size of the kitchen and overall cost also vary significantly depending on project complexity. Still, these steps are generally effective in getting your kitchen back in use sooner, often in as little as two weeks to 5 days, depending on the scope.

What Are the Common Delays in a Kitchen Renovation?

In any kitchen renovation, delays can arise unexpectedly and impact the overall timeline.

Unforeseen structural changes often necessitate additional planning and adjustments, potentially halting progress. These may occur during the design process or while trying to connect new installations to existing systems.

Similarly, extended delivery times for materials and complications during installation and fitting processes further contribute to delays. Many of these issues stem from supply chain interruptions and waiting for specific types of items.

How Do Unforeseen Structural Changes Cause Delays

Unforeseen structural changes often lead to considerable delays in kitchen renovations. When renovating, discovering issues with walls, ceilings, or foundational elements of the house can impact how long a kitchen renovation takes. These delays can vary considerably based on the size and condition of the existing structures.

  • Discovery of Load-Bearing Walls – Alterations might require additional support and structural fix work.
  • Damaged Infrastructure – Repairing water damage around the sink or pipes can extend the schedule.
  • Upgrading Outdated Systems – Updating electrical or plumbing work found inadequate.
  • Pest Infestations – These may be hidden behind cabinets or kitchen walls.
  • Compliance with Building Codes – Essential to check and meet regulations during renovations.

Each of these can take hours, days, or even weeks to resolve, depending on how early they are detected in the process. an take an additional time, meaning the renovation of a kitchen can take longer than initially planned.

Why Can Material Delivery Take Longer Than Expected

While unforeseen structural changes are a significant source of delay, the timing of material delivery can also substantially extend the duration of a kitchen renovation.

Material delivery often takes longer than expected due to various factors. Supply chain issues can delay shipments of essential items like cabinetry and appliances, which are vital for any successful kitchen makeover. For example, bespoke granite countertops or curves in cabinetry take longer to fabricate and deliver.

In some cases, custom elements required for a typical kitchen or a large kitchen can lead to longer lead times. Home remodeling programs frequently highlight the impact of such delays, emphasizing the importance of budgeting both money and time.

Contractors might face challenges with inventory shortages, especially for items displayed in showrooms, which can increase the overall timeline and potentially affect the project’s cost efficiency and completion date.

What Installation and Fitting Issues Lead to Delays

Once materials have finally arrived, installation and fitting issues often emerge as considerable sources of delay in kitchen renovations.

These obstacles can extend the timeline considerably, affecting how long it takes to renovate a kitchen or how long it takes to give your kitchen a new look. Understanding these common issues can help manage expectations and planning:

  • Mismatched components: Not all parts fit perfectly the first time, which can delay progress and cause minor reworks.
  • Technical challenges: Unexpected issues with adding electrical circuits or pipework can occur.
  • Skill availability: Specialist trades such as an electrician or plumber may be booked in advance.
  • Measurement errors: Reordering items due to mismeasurements, like granite tops or cabinets, can set the schedule back 5 days or more.
  • Last-minute changes: Alterations by homeowners late in the process can reset entire arrangements, causing stress and extra hard work.

These issues often happen toward the end of the project, making staying on track critical.

Conclusion

In summary, the duration of a kitchen renovation varies widely, influenced by factors such as the complexity of the design, the scope of the project, and the reliability of supply chains. Homeowners can expedite the process by making decisive choices and preparing adequately. However, it is essential to anticipate potential delays, which are commonly due to material shortages, unforeseen structural changes, or verification issues during final inspections.

Whether it’s advice on choosing fittings, referrals to reputable contractors, or simply a note about scheduling, maintaining open communication and realistic expectations are key. With general care and commitment, you can achieve a kitchen transformation that fits your mind, style, and future needs.

To transform a bathroom on a budget, focus on essential upgrades like updating fixtures, incorporating efficient lighting, and revitalizing wall paint. Opt for cost-effective materials such as ceramic tiles for durability and style. Install energy-efficient plumbing to enhance functionality and reduce long-term costs. Strategic choices in design and materials will revamp the space without breaking. Exploring further reveals additional tips and strategies for a functional and stylish bathroom makeover that can make a big impact without unnecessary hassle.

How to Transform an Old Bathroom into a New Look?

Transforming an old bathroom begins by identifying several steps, such as fixtures, lighting, and layout, that require updates. Whether you live in a flat, a house, or a shared home, these updates can be tailored to your needs.

How to transform bathroom involves incorporating current design trends to invigorate the space and blending functionality with aesthetics. Consider the shape and size of the room when planning changes, and modify existing features to suit your style.

Updating the bathroom vanity unit, in particular, offers both visual appeal and enhanced utility, proving essential in the renovation process. A custom vanity unit can elevate the look, especially when paired with a sleek radiator for added heat and comfort.

What Are the Key Elements to Transform Your Bathroom

Revitalizing an old bathroom into a fresh, modern space involves several key elements that guarantee functionality and style.

When renovating, it’s important to find a reliable plumber and sometimes an electrician to handle technical tasks safely and efficiently. The number of fixtures you want to update will determine the scope of work and the covering materials needed. Using white paint can brighten the space and create contrast against dark tiles or cabinetry, adding visual interest. Incorporating open shelving or open storage not only provides practical solutions but also helps to make the room feel larger by letting in much natural light. This thoughtful design approach ensures your bathroom looks amazing while remaining practical and easy to maintain.

When laying tiles, ensure each section is watertight and properly sealed to prevent moisture issues. These changes not only update your bathroom but also enhance its appeal and usability.

Opting for small space bathroom ideas does not mean compromising quality; carefully selecting materials and features can make your bathroom renovation project successful. Choosing the right kind of fittings and fixtures helps maintain durability and dry surfaces.

Additionally, focusing on essential upgrades within a bathroom on a budget ensures the renovation is both cost-effective and impactful. It’s pretty amazing how much of a great look you can achieve by making smart decisions and not overlooking any parts of the space.

How to Incorporate Bathroom Design Trends in Your Remodel

How can homeowners seamlessly integrate contemporary design trends into their bathroom cheap remodels while keeping an eye on the budget? One practical approach is to update key elements like wall tiles and light fittings to modern standards. Choosing ceramic tiles can offer a fresh and clean look, while strategically placed accent tiles can introduce a touch of style without overpowering the space.

Installing a shower enclosure or updating the shower curtain can transform the feel of the room. For a touch of luxury, consider a freestanding tub, which serves as a focal point.

Adequate bathroom lighting enhances the overall ambience, making the space feel larger and more inviting. Each selection should balance aesthetics with functionality to guarantee lasting satisfaction.

What Are the Benefits of Updating Your Bathroom Vanity

Updating your bathroom vanity not only refreshes the room’s aesthetics but also enhances its functionality. A new vanity can transform an outdated bathroom into a stylish and efficient space.

By choosing modern fixtures and a contemporary countertop, homeowners can create a focal point that elevates the overall design. The installation of a new sink and updated plumbing can improve water efficiency, potentially saving money on utility bills.

Additionally, a vanity upgrade often includes increased storage options, helping to declutter the space. Opting for durable materials during the update can also reduce long-term maintenance costs.

How To Renovate a Bathroom on a Budget UK

Renovating a bathroom within a tight budget requires strategic choices, starting with inexpensive design ideas.

Updating fixtures can be cost-effective if homeowners know which enhancements offer the best value without requiring extensive changes.

Additionally, acquiring DIY skills can significantly reduce labour costs and allow for more personalised design implementations.

What Are Some Cheap Bathroom Ideas for Renovation

When do affordable bathroom renovation options abound? Updating your bathroom can be both cost-effective and transformative.

A fresh coat of paint, for instance, is a cost-effective choice that can give your bathroom a new look cheaply. Opting for vibrant or soothing colours can alter the ambience considerably. When deciding on wallpaper or decor, remember that simple tricks like choosing a gloss finish can help reflect light and brighten the space quickly. Hanging a photo or a classic drawing can add a touch of personal decoration without much hassle.

Additionally, replacing old shower curtains with new, stylish ones is another inexpensive way to refresh the space. These curtains not only add to the aesthetic but also enhance privacy and functionality. Keep in mind the height of the curtain rod when hanging it to stand out and make a happy statement in your bathroom.

Such affordable bathroom updates are ideal for homeowners looking to revamp their space without substantial financial investment. By focusing on these small yet impactful things, one can efficiently and economically elevate the bathroom’s appearance. It’s important to notice the little details that contribute to the decor and think about what you want to purchase carefully.

How to Update Bathroom Fixtures Without Breaking

Beyond surface updates, reinvigorating a bathroom’s fixtures is another avenue for cost-effective renovation.

Installing new fixtures can drastically change the bathroom’s appearance without a complete overhaul. For instance, replacing an outdated faucet or shower head can refresh the space while keeping plumbing work minimal.

By preserving existing tiles—both floor and wall tiles—homeowners save on material costs and labour. A classic style tap or shower head with a slight gloss finish can complement existing elements beautifully.

Smart bathroom ideas focus on impactful updates like these that enhance a house in functionality and aesthetic appeal without stripping everything down to the studs. This approach not only preserves elements of the bathroom’s original charm but also remarkably cuts down on renovation expenses.

What Skills Can Help in a Budget Bathroom Remodel?

Acquiring specific skills can substantially lower costs when remodelling a bathroom on a budget. Learning essential electrical work, for instance, can prevent the high costs associated with hiring professionals for minor tasks during low budget bathroom renovations.

Understanding how to install new fixtures or tiles can also give the bathroom a fresh look without the expense of complete outsourcing. Mastering finishing touches, such as caulking, repainting, and wallpaper hanging, guarantees the renovated space is both practical and stylish.

However, homeowners should manage their expectations and remember the limits of their abilities, focusing on work that needs minimal technical expertise to avoid running the risk of costly errors. Developing these skills provides more control over budget bathroom remodelling ideas, saving lots of time and money in the end.

What Are the Best Practices for Bathroom Tile Installation?

When planning a renovation, selecting the appropriate bathroom flooring involves considering both aesthetic appeal and durability. For a tiny bathroom, using white subway tiles on the walls can create a bright, spacious feel that complements white walls beautifully.

The process of installing bathroom tiles, whether on walls or floors, requires methodical steps to guarantee longevity and ideal appearance, including careful fitting around fixtures like the toilet seat and ensuring the skirting board is properly sealed.

Maintaining these tiles with proper cleaning techniques is essential to preserve their look and prevent damage over time, making the effort a truly rewarding project.

How to Choose the Right Bathroom Tile for Your Renovation

Choosing the right bathroom tile for your renovation goes beyond simply choosing a style you love; it requires considering durability, cost, and maintenance, especially when working with a limited budget. For bathroom walls and floors, ceramic tiles offer longevity and are easy to clean, helping to keep labour costs down. Subway tiles can create a timeless look for shower walls, particularly in a corner shower enclosure, while larger tiles may reduce the grout lines, simplifying maintenance.

Installing wall panels can be a budget-friendly, stylish alternative to traditional tiled walls, especially when paired with new hardware like faucets and towel rails. Ensuring your existing hardware and drains are in good condition can also help avoid unnecessary expenses. For added storage, consider incorporating a dresser that complements the tile design.

  • Durability: Choose materials like ceramic or porcelain that withstand humidity and wear.
  • Aesthetic Appeal: Coordinate colors and textures across shower tiles, wall coverings, and floor tiles for a cohesive look.
  • Maintenance: Opt for grout that resists mould and staining to prolong the pristine appearance of your bathroom.

Steps to Install Bathroom Wall Tiles and Floor Tiles

Before installing bathroom wall and floor tiles, proper surface preparation is crucial to guarantee a smooth and durable finish. In any existing bathroom, thoroughly clean and level the space to renovate a bathroom efficiently, especially if you’re feeling tired of the old look and want a bold change.

Apply a waterproofing membrane, especially around the new bath area, to protect against water splashes and surround the space with materials like stone or glass for a modern touch. When choosing tiles, consider how they will enhance your bathroom by improving both its functionality and aesthetics, whether using a trusted brand or selecting stained tiles for added character.

Use spacers to facilitate even placement of wall and floor tiles, ensuring the edges are perfectly aligned to avoid future issues. Always double-check alignments; this step is absolutely essential to fix any mistakes early. For more detailed instructions and best practices, including the right adhesive choices and techniques to prepare your walls, check out our guide on bathroom tile installation so everybody can achieve professional results and enjoy the rest of their refreshed bathroom.

How to Maintain Tiles to Keep Your Bathroom Looking New

Maintaining bathroom tiles is vital for preserving their appearance and extending their lifespan. Proper care prevents the buildup of soap scum and mold, which can detract from the aesthetic of your main bathroom. It’s always wise to carry out regular maintenance with the advice of a professional tiler or contractor, especially when dealing with unexpected issues like grout damage or tile cracks.

Using the right bathroom products is essential to guarantee that the tiles on the floor and walls remain clean without causing damage. You can switch between different pH-neutral cleaners or, alternatively, follow the recommendations of your trusted friend or expert for the best results. Applying clear polyurethane can protect tiles, making your bathroom look perpetually new.

  • Regular Cleaning: Use pH-neutral cleaners to avoid eroding grout and tile glaze, applying them in straight motions to ensure even coverage.
  • Sealant Application: Every two years, a sealant is applied to guard against water damage.
  • Avoid Harsh Chemicals: Stick to manufacturers’ recommended cleaners to maintain tile integrity, and use fine sand or other materials only when necessary for repairs.

These strategies guarantee your old bathroom’s tiles contribute positively to its interior design, making the space feel larger and more inviting.

What Are Essential Plumbing Tips for Bathroom Renovation?

When renovating a bathroom, efficient plumbing guarantees functionality and cost-effectiveness. Choosing the right basins and fixtures can significantly enhance the bathroom’s aesthetics and utility, making it essential to evaluate options that offer both style and durability.

The position of these fixtures is important, as even a few inches can affect the overall flow and usability. Many builders recommend adding beadboard panels to protect walls from moisture and mould, combining practicality with charm.

Additionally, implementing preventative measures against plumbing issues can save homeowners from future headaches and expenses. Remember not to forget regular maintenance, as quick fixes can pop up if problems are left unattended. Renovation often requires patience—sometimes you’ll need to wait several hours for sealants or adhesives to set properly. Approaching the project with creativity and care can make all the difference, especially when you specifically plan to sell your home later.

How to Plumb Your Bathroom Efficiently

Efficient plumbing is vital to the success of any bathroom renovation, guaranteeing both functionality and cost-effectiveness.

To breathe new life into your bathroom with seamless integration of modern fixtures like built-in shower panels and walk-in showers, it is important to focus on the plumbing basics.

  • Start by Removing Old Fixtures: Begin the renovation process by carefully removing outdated sanitaryware, including the toilet paper holder, to make way for new installations. If you’re unsure how to turn off the cold water, consult a professional plumber to avoid mistakes.
  • Plan for Efficiency: Design the layout to minimize pipe runs and bends, which helps maintain intense water pressure and reduces potential leak points. This step can add visual interest while ensuring optimal flow. The correct number of fixtures and their placement should be determined early for the best results.
  • Upgrade Pipes and Fittings: Replace old piping with corrosion-resistant materials to prevent future issues and guarantee a smooth operation of new shower panels and other bathroom features. If needed, involve an electrician for lighting or electrical covering adjustments.

What New Fixtures Make a Difference in Bathroom Renovation

After ensuring the plumbing foundation is set, selecting the right fixtures becomes the next step in transforming a bathroom. Depending on your budget and style preferences, incorporating a walk-in shower can greatly enhance functionality and style. A drop-in sink paired with open shelving creates a clean, modern look while ensuring practical storage solutions. Choosing a floor-mounted bathtub can serve as a luxurious centrepiece.

The ideal placement of light fixtures will brighten the room and improve usability. Adding bathroom plants introduces a natural element, promoting relaxation. When selecting a bathroom suite, consider the colour, style, and product guarantees to ensure longevity and satisfaction.

Thoughtful choices in accessories complete the transformation, creating a contrast that delivers visual interest and balance. Fixtures like taps also play a big role in both function and style. Lastly, don’t forget to inspect for any tiny cracks or imperfections in your fixtures, as even a small flaw can affect performance.

A good mix of modern and classic elements can inspire a fresh look. Sometimes you might be surprised by how a small fraction of changes can make a manageable yet perfect difference. If you’re unsure, it’s wise to do some research or consult with a professional who offers reliable services.

What was originally a plain space can be transformed by working with plenty of ideas and incorporating raw materials, often called for their unique texture and appeal.

How to Prevent Plumbing Issues in a Bathroom Remodel

To prevent plumbing issues during a bathroom remodel, it is vital to prioritize a thorough inspection of existing pipes and connections before commencing any work.

Confirming that the plumbing in the current bathroom is up to standard can save significant costs and headaches later. It’s important to address any signs of deterioration or leaks to transform the bathroom effectively while sticking to a budget.

  • Update Shut-Off Valves: Replace old valves to guarantee you can easily control water flow during and after the remodel.
  • Check for Compliance: Verify all plumbing work complies with local building codes to avoid future legal and functional problems.
  • Plan for Accessibility: Design the plumbing layout for easy access to facilitate future repairs or upgrades to bathrooms, reducing long-term maintenance issues.

Budget-Friendly Bathroom Finishing Touches

Adding finishing touches to a budget-friendly bathroom renovation involves strategic choices that hold both function and style in balance. Exploring budget-friendly lighting options can create a quick and noticeable bathroom home improvement, enhancing the ambience without breaking the bank. The fact is, small bathroom changes often make a big difference when moving from an outdated look to something fresh.

Choose finishes that draw attention and contrast nicely with your tile or fixtures for a subtle style. Selecting the right shower curtains and head, along with thoughtful small bathroom products, can transform the space efficiently. Even open storage options can add elegance while saving space.

Repainting with white paint or soft hues is a great way to brighten the spot and make the bathroom feel more inviting. You can also get rid of outdated décor in order to create a fresh, minimal aesthetic. In addition, having a list of tasks to complete helps make the process less hard and more manageable.

It only takes a few minutes to see a noticeable difference, which is why this type of renovation is popular. The question many people ask is whether these changes will last, and with the right care, they definitely will.

What Are Cost-Effective Ways to Enhance Bathroom Lighting

Enhancing bathroom lighting need not be expensive or complicated. For compact bathrooms or powder rooms with much natural light, strategic lighting choices can create the illusion of more space and bring your dream bathroom to life.

  • Maximize Natural Light: Use reflective surfaces and white tones to amplify daylight, making the room feel larger and more open.
  • Install LED Lights: Choose energy-efficient LED fixtures that provide bright, even lighting without the high cost.
  • Layered Lighting: Combine overhead lights with task lighting around mirrors to enhance functionality and ambience, tailoring illumination to the specific needs of the space.

How to Choose the Right Shower Curtains and Head

While selecting the right shower curtain and head for your bathroom, consider functionality and aesthetic appeal to stay within your budget.

Opting for a shower curtain that complements the colour scheme and design of the different bathroom elements can transform the look without buying a whole new set of bath accessories. Luxury doesn’t have to come with a high price tag; look for sales or discount stores that offer stylish options.

Similarly, upgrading the shower head can elevate the whole bathroom experience. Choose a model that provides efficient water flow and matches the existing fixtures regarding style and finish. For example, a chrome shower head can pair well with stainless steel taps, bringing cohesion to your design.

What Small Bathroom Products Can Transform Your Space

Several small bathroom products can significantly enhance the appeal and functionality of your bathroom without straining your budget.

A great way of adding character is through items sourced from architectural salvage yards. These pieces often come in a range of styles and are priced similarly to new items, but add a unique touch.

  • Wooden Shelves: Reclaimed wood from old doors or furniture can be transformed into stylish, functional shelves. This not only recycles materials but also adds a warm, rustic charm to your space.
  • Vintage Mirrors: Searching salvage yards for vintage mirrors can add an elegant, timeless feel to your bathroom ceiling, often at the same price as contemporary versions.
  • Decorative Hooks: Cast iron hooks or repurposed handles from cabinets can serve as artful towel hangers, injecting life and personality.

When shopping, consider how many places you’ve visited for inspiration before settling on fixtures. You’ll often find better prices and more unique items this way.

Conclusion

To summarize, transforming an old bathroom into a refreshed, modern space can be achieved effectively with thoughtful budgeting and strategic planning. By focusing on cost-effective renovations, prudent tile installation, and essential plumbing updates, homeowners can significantly enhance the aesthetic and functionality of their bathrooms. Adding a budget-friendly option ultimately personalises the space, ensuring the renovated bathroom not only meets practical needs but also reflects individual style preferences, all without breaking the bank. With the right support, these choices can be both cost-effective and visually appealing.

Renovation involves making structural changes to a building to improve functionality and appeal, often demanding Compliance with building regulations and permits. Refurbishment, however, focuses on enhancing the aesthetics and efficiency of a space without extensive structural modifications, preserving its original character. Understanding these differences helps property owners decide how best to upgrade their properties. Exploring further can reveal more about when each approach is most beneficial and how to implement them successfully.

What is Refurbishment?

Refurbishment involves updating or improving a building without altering its essential structure, focusing primarily on aesthetics and efficiency.

Common refurbishment projects include repainting, installing new flooring, or upgrading HVAC systems.

This process is often chosen over renovation when the goal is to preserve the structure’s original character while enhancing functionality.

Defining Refurbishment and Its Objectives

While often confused with renovation, refurbishment refers to the process of improving and restoring the condition and appearance of a building or facility without altering its fundamental structure or function.

This typically involves work such as repainting walls, enhancing interior design, and other modifications to improve aesthetics.

The primary objective of property refurbishment is to increase the property’s overall value and enhance the functionality of a property, making it more appealing and comfortable for occupants.

Such interventions focus on maintaining and optimizing the existing condition of the property without extensive reconstruction, thereby preserving its original character while adapting to modern needs and standards regarding appearance and utility.

Common Refurbishment Projects

To enhance the functionality and appeal of a building, common refurbishment projects often focus on areas most frequently used or visible. These projects, undertaken by property owners, can range from optimizing the floor layout in office spaces to increasing energy efficiency through updated insulation and lighting.

Refurbishment might prioritize preserving historical features for listed buildings while addressing maintenance needs. In residential and commercial properties alike, tasks such as repainting, updating fixtures, and expanding storage space are frequent.

Unlike renovation, refurbishment does not involve a complete overhaul but aims to refresh and repair existing structures and systems. This differentiation is crucial for grasping the full extent and intention behind renovation and refurbishment efforts in the domain of property development.

When to Choose Refurbishment Over Renovation

Deciding between refurbishment and renovation requires evaluating a property’s specific needs and goals. Refurbishment involves improving aesthetics and is less intrusive, making it ideal when the aim is to enhance the existing property without making considerable structural changes. Opting for house refurbishment can significantly increase the value of a property and make the property attractive to potential buyers by focusing on the aesthetics of a space.

AspectRefurbishment vs Renovation
FocusAesthetics, surface updates
IntrusivenessMinimal, less disruptive
Cost ImplicationGenerally lower than renovation
OutcomeEnhances value, attractiveness without overhaul

Refurbishment is preferred when the primary goal is to refresh rather than reconstruct.

What is Renovation?

Renovation involves updating or improving a structure to make it more functional or appealing. This process can include projects ranging from simple updates to complete structural overhauls.

Understanding when a renovation is necessary, along with recognizing successful examples, can provide valuable insights into the scope and impact of such projects.

Key Elements of a Renovation Project

While many use the terms interchangeably, renovation involves a significant process that focuses on restoring or improving a building’s structure and functionality. A renovation project may include structural changes such as adding or removing walls to enhance the use of space. New flooring and updates to electrical systems are often part of the project, guaranteeing the building meets current standards.

Before undertaking a renovation, it’s vital to consult local authorities to comply with building regulations and obtain necessary planning permission. This guarantees that the structural integrity of the building is maintained and handled by experienced builders. Adhering to these regulations is essential for the safety and legality of the project.

ElementDescriptionConsiderations
Structural ChangesAdding/removing walls, new flooringMust guarantee structural integrity
Electrical SystemsUpdating wiring, panelsCompliance with safety standards
Regulatory ComplianceSecuring permits, following regulationsCoordination with local authorities

Examples of Successful Renovation Projects

Understanding the theoretical aspects of renovation allows property owners and building contractors to appreciate its practical applications more clearly. Successful renovation projects often involve significant structural changes that enhance both the function and aesthetic of a building.

For example, an old building such as a warehouse can be transformed into a vibrant retail space and apartments in a historic downtown area, retaining the original condition and architectural charm while modernizing interiors. This kind of renovation creates value by transforming the whole building and contributes positively to the community by boosting business and economic activity.

Another example is a deteriorating public library that underwent extensive renovations, including structural reinforcement and technological re equipping, turning it into a state-of-the-art facility that serves as a cornerstone for educational growth. Such other projects demonstrate how renovation and refurbishment can breathe new life into properties and communities.

When is Renovation Necessary?

Renovation generally refers to making significant structural alterations, often to meet new building regulations or adapt to changing functional needs. Unlike refurbishment, renovation involves changes to the whole building or its core elements.

For instance, to comply with updated safety, plumbing, or energy efficiency standards, an old structure might need renovating to meet new council building regulations. Renovation may also involve adding extensions, new windows, or replacing critical systems.

Renovation and refurbishment are often used interchangeably, yet the former is a more extensive process, transforming a building to align with contemporary needs and legal demands. This level of overhaul is essential when updates are substantial.

Exploring the Difference Between Refurbishment and Renovation

Understanding the key differences between refurbishment and renovation is essential in the construction and real estate industry.

The primary distinction lies in the scope of work: refurbishment typically involves repairs, decorating, and restoring a building to good condition, while renovation encompasses structural changes and more comprehensive alterations.

Refurbishment focuses on improving aesthetics and functionality without changing the building’s structure. This includes cleaning, repainting, replacing doors or windows, and updating fixtures like bathrooms or kitchens. It often involves retrofitting older elements to modern standards without altering layouts.

Renovation, on the other hand, means remodeling or transforming the whole building or parts of it, such as removing walls, adding extensions, or completely updating systems like plumbing and wiring. This level of work is essential when renovating to meet new regulations or adapting the building to new uses.

Main Difference: Structural Changes

Although both refurbishment and renovation involve making improvements to a building, the main distinction lies in the nature of the changes made.

Refurbishment focuses on improving aesthetics, often involving repairs and restoring elements to their former condition without changing the structure of the building. This can include painting, updating fixtures, renovating, and refinishing surfaces.

On the other hand, renovation goes beyond merely improving the aesthetics; it involves changing the structure of the building. This could mean removing walls, adding new sections, or altering the layout to enhance functionality.

Renovation can help adapt a space to new uses, integrating more significant structural modifications than the typically superficial updates seen in refurbishment.

Difference Between Refurbishment and Renovation

Exploring the differences between refurbishment and renovation reveals varied objectives and processes in updating buildings.

The subtle difference between renovation and refurbishment primarily hinges on the scope and intent of the project. Renovation typically involves making significant structural changes to enhance a building’s functionality or to correct defects. Renovation examples include altering layouts, replacing critical systems like plumbing or wiring, and other transformations affecting the building’s core structure.

Conversely, refurbishment focuses on improving a space’s existing condition and aesthetics without extensive structural modifications. This type of project might include painting, updating fixtures, or restoring original features.

Understanding the difference helps property owners decide on a suitable approach based on their needs and the building’s requirements.

How Building Regulations Affect Refurbishment and Renovation

While refurbishment and renovation aim to improve a building, the specific requirements and constraints imposed by building regulations can significantly influence the extent and nature of the work performed.

Building regulations guarantee that any changes, especially those making significant structural changes, adhere to new building standards. Obtaining necessary permits is essential for renovations that involve changing the structure or the entire structure of a building. These legal requirements guarantee that the property meets safety and efficiency standards.

Refurbishment, although generally less complex, still requires Compliance with certain building regulations, particularly when updating old systems or structures.

Both processes must navigate these regulations carefully to avoid legal complications and guarantee the building’s integrity and functionality.

Do You Need Planning Permission for Refurbishment and Renovation?

When commencing renovation or refurbishment, it is essential to determine whether planning permission is required.

This involves understanding the specific building regulations and their application to each project type.

Additionally, property owners must consider Key factors to ensure compliance and prevent potential legal issues.

When Planning Permission is Required

Determining whether planning permission is required for refurbishment, renovation, or loft conversions often depends on the extent of the changes. In the UK, rules can vary by location and whether the property is residential, commercial, or a heritage site.

If you’re embarking on a project that involves altering the structure of a room or building, such as extensions, converting bedrooms, or installing a new kitchen, then permits and approvals will likely be needed. Projects that expand the property’s footprint or impact its exterior appearance, like retrofitting for energy efficiency, typically require formal approval.

Whether you’re a homeowner, landlord, or developer working on commercial spaces, it’s essential to consult with local authorities. This helps ensure compliance with legal regulations before starting work, especially when redecorating, knocking through walls, or rebranding a business space. Avoiding this step could result in delays, fines, or needing to undo the work already carried out.

Key Legal Considerations for Property Owners

While improving your property may seem straightforward, there are big differences between tasks that can be done without permission and those that require official approval. Legal requirements may vary when a property is leasehold, accommodates tenants, or is subject to specific heritage protections.

Chartered surveyors and experienced building contractors can provide expert guidance on planning and restoration, ensuring that any improvements, such as changing ceilings, doors, or furniture, don’t violate planning laws. For instance, installing appliances in listed buildings or converting unused areas into aesthetically pleasing living spaces may demand extra scrutiny.

Understanding these factors ensures that any upgrades you make—from decorating to full-scale converting of spaces—protect your investment in the long run.

How to Plan Your Refurbishment and Renovation Projects

Effective planning starts with defining clear objectives. Whether your project involves restoring something to its original condition, making it more energy efficient, or just giving it a cleaning and decorating refresh, every detail matters.

Budgeting is crucial. The cost of materials, the less time spent, and the professionals you hire will all impact the outcome. This stage is where customers often make the mistake of underestimating what’s needed, so it’s wise to plan for unexpected resources, expenses, or delays.

Steps to Start a Renovation Project

Start by evaluating the current condition of the room or building—check for damage, outdated layouts, or inefficient appliances. Then, define the scope of work, such as redesigning the kitchen or upgrading bathrooms, and decide whether you’ll be purchasing new furniture or just repainting.

Key Considerations:

  • Assessing the Condition: Look at walls, floors, and existing fixtures.
  • Choosing Materials: Opt for the sustainable best options that are aesthetically pleasing and fit the design.
  • Hiring Professionals: Work with experienced contractors, architects, or interior designers to achieve a polished, high-quality result.

Don’t overlook the value of talking to experts, especially when putting plans in motion that involve rebuilding or significant conversion efforts.

Budgeting for Refurbishment and Renovation

A realistic budget should encompass all potential costs—materials, labour, planning permissions, and any furniture or appliances you may need. Allow extra funds for any unexpected damage or structural issues that might arise.

A well-thought-out budget helps in making your property more desirable to buyers and tenants. It ensures that your investment in aesthetics and functionality pays off, both immediately and in the long run. This is especially true in commercial or rental cases, where trust and value are critical to customers and landlords alike.

Finding the Right Architect and Contractors

Choosing the right team can make a big difference in how smoothly your project runs. Whether you’re converting an attic into a bedroom or restoring a historic commercial unit, the professionals you hire must be qualified and experienced.

Key Tips:

  • Experience with Similar Projects: Pick teams that have worked on extensions, loft conversions, or heritage sites.
  • Licenses and Insurance: Confirm all documents are in place to cover any risks.
  • References and Portfolio: Look at past projects—how they brought something to a good state or transformed a space into something aesthetically pleasing.

Doing this can save time, reduce stress, and lead to better outcomes. It’s also helpful to get a second opinion when unsure.

Conclusion

While refurbishment focuses on restoring a space to a good state through cleaning, redecorating, or minor repairs, renovation typically involves larger changes, like altering layouts or updating exterior elements. The two terms may be interchangeable in everyday words, but they involve different scopes of work.

Before getting started, check if you need planning permission and understand the legal and financial implications. Whether you’re working on bathrooms, commercial spaces, or heritage buildings, success lies in strategic planning, hiring the right team, and keeping your goals aligned with your budget and timeline.

In the UK, where buildings often reflect a rich culture and varied architecture, these considerations help preserve both style and function. By taking these steps, you’ll not only achieve a more energy-efficient, functional, and aesthetically pleasing property but you’ll also ensure peace of mind, knowing your project has been handled with care, expertise, and full compliance.

Property refurbishment refers to the process of improving a building to enhance its functionality and aesthetic appeal, typically involving updates and enhancements. In contrast, renovation involves more extensive structural changes, often altering the building’s layout and function. Refurbishment can greatly increase a property’s market value by modernizing features while preserving its original charm. For further perspectives on elevating property through both words refurbishment and renovation, one might consider exploring the various types and benefits they offer.

What is Property Refurbishment?

While many may recognize the term, understanding property refurbishment requires acknowledging it as a worthwhile investment—a process focused on improving an existing property’s functionality, appearance, and market appeal.

Refurbishment can range from small updates like redecorating or replacing a dishwasher, to more extensive improvements such as modernizing electrical systems or updating an oven and kitchen setup. The scope of work varies depending on the condition, size, and intended use of the property.

Each project is tailored to suit the specific needs of the homeowner, with the goal of enhancing comfort, maintaining or increasing property value, and attracting potential buyers, especially in competitive markets.

At every stage, our team is prepared to manage your refurbishment project with care and expertise, ensuring it is completed safely, on time, and within budget.

Understanding the Property Refurbishment

While many may recognize the term, understanding property refurbishment entails recognizing it as a thorough process aimed at improving an existing property.

This refurbishment process varies widely depending on the condition of the property and the objectives of the property owner. Common types of property refurbishment might include simple updates like installing new decor or more extensive adjustments, such as redoing electrical systems.

Each refurbishment project is tailored to enhance the functionality and aesthetic appeal of the property, thereby potentially increasing its market value. Trust us to manage your refurbishment process efficiently, ensuring the best return on investment.

The benefits of property refurbishment are extensive, often leading to more efficient use of space and updated living conditions that align with modern standards.

The Difference Between Refurbishment and Renovation

Although refurbishment and renovation are terms often used interchangeably, they refer to distinct types of property improvements.

Property refurbishment typically involves updating or revitalizing an existing space, such as installing a new kitchen or repainting walls. It often aims to bring a property up to current standards without altering the fundamental design or structure.

On the other hand, a renovation project might involve more significant changes, like loft conversions or restructuring rooms, which can require adherence to building regulations. Consulting a trusted advisor team before acquiring investment properties can ensure the best decisions are made.

The difference between renovation and refurbishment lies in the scope and intent: refurbishments generally preserve and enhance existing features, while renovations can transform the layout or purpose of various types of property, often including common renovations that upgrade entire systems or structures.

Why Refurbish Your Property?

Property refurbishment involves updating and enhancing existing structures and systems to meet current standards and aesthetics. Unlike renovation, which often entails considerable structural changes, refurbishment can also focus on updates that greatly increase your property value without extensive reconstruction. Many prefer this route because it reduces stressful delays, especially when working under a tight period or budget.

Reasons to choose refurbishment include the desire to preserve the character of a property while improving functionality and efficiency. This can greatly boost the value of your property, making a refurbished property more appealing in the real estate market. Considerable value can be added by making strategic updates, such as replacing roof tiles, for example. Ultimately, refurbishment offers a cost-effective way to enhance a property’s value and appeal, making it a worthwhile investment for many.

You’ll find that even small upgrades, like fitting a modern dishwasher or replacing an oven, can make a big difference. With articles and blog posts available on our website, you can explore further ways to refresh your property.

Additionally, being aware of legal considerations and knowing how to act when it comes to permissions or restrictions is essential. Whether your property is located in a conservation area or not, following the right process will help you avoid notice issues or project delays.

If you’re planning a refurbishment, it’s important to stay committed to your goals, have the right team by your side, and take pride in the process. The reality is that with the right knowledge, you can safely improve your home beyond expectations, exceeding even your expectations by the time the project reaches its final date of completion.

How Does Property Refurbishment Impact Property Value?

Property refurbishment is an excellent way to boost both the aesthetic appeal and market value of a home or investment property. Whether you’re looking to refresh tired interiors or address structural issues, refurbishments—when executed to the highest standard—can significantly increase your property’s overall worth.

However, not all projects yield the same return. The type of refurbishment, the materials used, and adherence to building regulations all play crucial roles. Working with experienced contractors, staying committed to a clear vision, and understanding financing options such as refurbishment loans or bridging loans are also key.

Let’s explore how refurbishment contributes to value and what you need to consider along the way.

Enhancing the Value of Your Property

Refurbishing your property does more than just improve how it looks—it enhances functionality, modernises key areas like kitchens and bathrooms, and makes it more energy efficient. Whether you’re updating a small flat or undertaking a larger project like a loft conversion, a well-executed refurbishment can:

  • Attract Buyers or Tenants: A visually appealing home with updated interior finishes, new flooring, or a converted kitchen can significantly improve buyer interest rates.
  • Increase Comfort: Enhanced insulation, double-glazed windows, and energy-efficient systems improve daily life and reduce long-term costs.
  • Add Living Space: Projects such as loft or garage conversions create additional living space, which is especially desirable for growing families or landlords seeking better rental yields.

Factors Influencing Property Value Increase

While various factors contribute to the increase in property value, refurbishment plays a pivotal role by directly enhancing both the aesthetic and functional aspects of a building. The renovation process, especially in commercial properties, can lead to substantial increases in a property’s value. It involves the key decision to ensure a property meets building control standards, which can further elevate the value of your home or business space.

Type of RefurbishmentExpected CostPotential Value Increase
StructuralHighHigh
Energy EfficiencyMediumModerate to High
Compliance UpgradesVariableHigh

Investing wisely in property maintenance and choosing the right type of refurbishment can balance the costs of refurbishment with significant value gains.

Refurbishment vs Renovation: Which Adds More Value to Your Property?

Understanding the distinctions between refurbishment and renovation is essential for property owners aiming to maximize their investment.

Property refurbishment typically focuses on restoration and minor updates, potentially increasing the property’s value by enhancing its appeal without extensive structural changes.

In contrast, renovation involves more significant transformations that can drastically alter the property and usually require adherence to planning and building regulations.

Here are key considerations to determine which adds more value:

  1. Scope of Work: Renovation may involve structural changes, while refurbishment usually updates the existing layout.
  2. Investment Cost: Refurbishment often costs less than complete renovations.
  3. Market Demand: In some markets, the sheer aesthetic improvement from refurbishment may be the better option for a property to sell quickly.
  4. Regulatory Concerns: Renovations might lead to more complications with local codes, impacting both timeline and budget.

Do You Need Planning Permission for a Renovation Project?

When commencing a property renovation, determining whether planning permission is required is one of the most important early tasks. It’s not simply about getting started—it’s about setting your project up for success with the right knowledge and legal footing.

This period of preparation involves understanding building regulation requirements and broader legal considerations tied to property refurbishment. Ignoring these steps can be stressful, leading to delays, financial setbacks, or worse, legal consequences.

When Planning Permission is Required

Whether or not you need planning permission depends heavily on the scope, location, and type of work you’re undertaking. Local councils enforce specific guidelines that must be followed. Typically, permission becomes necessary in the following circumstances:

  • Structural Changes: Altering load-bearing elements (like knocking down internal walls or adding new rooms) usually requires approval to ensure safety and compliance.
  • New Windows or Doors: Installing or altering windows, particularly double-glazed units, might need permission, especially if your property is in a conservation area.
  • Extensions or Reductions: Any change to the footprint or height of the property must be reviewed by your local authority.
  • Historic or Listed Buildings: If your home is heritage-listed, even minor changes may require specialist consent to preserve its historical character.

These permissions act as safeguards for the structural integrity, energy efficiency, and aesthetic standards of UK properties.

Understanding Building Regulation Requirements

Beyond planning permission, property refurbishment often necessitates compliance with building regulations, which serve as a separate set of standards guaranteeing safety, energy efficiency, and accessibility.

These building codes and regulations are vital regardless of the type of home renovation done, whether it involves significant structural changes or minor aesthetic updates.

For any refurbishment and renovation project, it is essential to ascertain that the property meets current requirements, particularly in areas like building, plumbing, and electrical services.

Differences between refurbishment work and renovation often lie in the extent of work. Still, both need to take into account these regulations to guarantee the state of the property remains safe and compliant.

Understanding these guidelines helps in planning permission and building processes, making certain renovations are legally and functionally sound.

Legal Considerations for Property Refurbishment and Renovation

While commencing a property refurbishment or renovation project, one of the primary legal factors is determining whether planning permission is required.

Property refurbishment is the process of updating or improving a building, often to address maintenance needs or enhance value. Here are some key points to examine:

  1. Extent of Changes: Minor modifications, often called light refurbishment, might not need permission, but major alterations typically do.
  2. Local Regulations: Property developers must check local council regulations, as they vary widely.
  3. Historic Properties: Special permissions are usually required for house refurbishment in heritage-listed areas.
  4. Refurbishment Loans: Financial institutions might require approved planning permissions before granting refurbishment loans for property purchases.

Individuals choose to refurbish their rental properties or fix them for various reasons, which impacts the legal prerequisites involved. Objectives, market opportunities, and finances should be considered when planning refurbishment projects.

What Are the Types of Property Refurbishment?

Property refurbishment encompasses a variety of types, each catering to different needs and outcomes.

A property refurbishment project can differ significantly in complexity, depending on the scale, location, and objectives. Property owners need to identify the right type of refurbishment that aligns with their objectives, whether enhancing functionality, style, daily life, aesthetics, or overall value.

Understanding the specific benefits of each refurbishment type can guide homeowners in making informed decisions that maximize their investment and reduce unexpected expenses over the long run.

Exploring Different Types of Refurbishment

Exploring the different types of property refurbishment reveals a variety of approaches, each suited to specific goals and contexts.

Property owners need to know about refurbishment options to make informed decisions, particularly when partnering with builders, decorators, or other certified professionals.

Here are four main types:

  • Refurbishment: This involves cosmetic updates such as painting, decorating, and updating fixtures to make the property more desirable and aesthetically pleasing.
  • Structural Refurbishment: Addresses the core structural alterations of an old property, including walls, roofs, and foundations, and ensures it is structurally sound. These projects often involve plumbers, electricians, or even rebuilding parts of the structure to create a safer and more practical space.
  • Upgrade Refurbishment: Focuses on upgrading kitchens, bathrooms, heating, plumbing, and electrical systems to meet modern standards. This can include new installations, new flooring, and lighting to meet clients’ expectations.
  • Restoration Refurbishment: Aims to restore historical properties in the UK to their original condition, which may vary depending on age, listed status, and location.

Choosing the Right Type of Refurbishment for Your Needs

Having outlined the main types of property refurbishment, property owners need to select the approach that best aligns with their specific needs and objectives.

Choosing the right refurbishment strategy can be vital, especially since real estate investing carries substantial financial risks and requires commitment and a clear understanding of your goals.

Whether renovating a mid-terrace bedroom or deciding between refurbishment and renovation for a larger estate, understanding the key differences is essential. This is where consulting with an estate agent or industry professional proves invaluable.

Each option in the refurbishment and renovation spectrum of property improvement has its own set of benefits and potential financial pitfalls. In larger projects, delays, permits, and structural issues must be considered.

Thoroughly evaluating the refurbishment process helps mitigate risks and ensure that the investment optimizes value and functionality according to the priorities of the owner, tenants, finances, and the trusted advisor.

Understanding the Benefits of Different Property Refurbishment Types

As we explore the various types of property refurbishment, fix and flip projects, and loft conversions, it becomes clear that each category serves distinct purposes and offers unique advantages.

These enhancements not only improve functionality but also elevate the property’s value through exceptional service and design. Refurbishment finance and even bridging loans can help fund these upgrades, especially in complex or time-sensitive cases.

  • Refurbishment: Involves updating fittings, light fixtures, painting walls, and installing double-glazed windows to improve aesthetic appeal and energy efficiency.
  • Structural Refurbishment: Focuses on major repairs like fixing doors, repairing damage, or replacing roof tiles—essential for long-term health, safety, and comfort.
  • Performance Refurbishment: Enhances the building’s comfort and energy rating by upgrading insulation, heating systems, or ventilation—a popular choice for landlords or those planning to rent the property.
  • Outdoor Refurbishment: Revitalizes exterior space, such as gardens or balconies, and may involve new kitchen decking, paving, or fencing. These additions can significantly increase curb appeal and sales potential.

How to Manage Refurbishment Costs Effectively?

Managing refurbishment costs effectively begins with a precise estimation of expenses.

Whether it’s a kitchen remodel or a full property refurbishment project, property owners should explore financing solutions like refurbishment finance, refinance, or bridging loans to make such commitments financially viable.

Focusing on refurbishments that maximize overall value ensures both the utility and financial viability of the investment.

Estimating Refurbishment Costs

Estimating refurbishment costs accurately is vital for managing a property renovation budget effectively.

Whether the project involves acquiring investment property, setting up office space, or revitalizing a tired residential unit, understanding the financial implications is critical.

To manage costs effectively:

  • Assessment of Needs: Identify what repairs, structural issues, or upgrades need to be addressed.
  • Detailed Quotations: Obtain multiple quotes from builders to ensure competitive pricing and match clients’ expectations.
  • Contingency Planning: Allocate 10–20% for unexpected expenses, especially in older properties where issues may arise.
  • Regular Monitoring: Track project stays on schedule and within budget. This is particularly important if the property fails to sell or is key to building wealth through rental properties.

Maximizing Property Value with Smart Refurbishments

To maximize property value through refurbishments, it is vital to prioritize cost-effective strategies that enhance both interior appeal and practical functionality.

Here are key steps to manage costs and boost value:

  • Plan Thoroughly: For a 3-bedroom mid-terrace, focus on essentials like a new kitchen, modern flooring, or a loft conversion to add additional living space.
  • Budget Wisely: Allocate funds strategically. Don’t overspend on expensive features unless they are reflected in future sale or rental value.
  • Choose Durable Materials: Select fittings and finishes that are built to last and offer comfort for occupants, which is especially important for landlords and tenants alike.
  • Monitor Progress: Keep an eye on the schedule to prevent delays and ensure your contract is met with professionalism and excellence. Communication with workers is vital to keep everything on track.

Conclusion

In summary, property refurbishment enhances both the aesthetics and functionality of a building, potentially increasing its market value. Whether just updating the decor, installing a single room, or undertaking a complete overhaul, careful planning and budget management are essential. Understanding the need for planning permissions can guarantee legal compliance and smooth execution. By considering various refurbishment types and strategies, property owners can make informed decisions that align with their goals and financial constraints, ultimately achieving a successful refurbishment project. For those wondering what is house refurbishment, it refers to the process of improving and updating a property to enhance its appearance, performance, or value.